Windows 10 is probably the most effective operating system that Microsoft has developed yet. It combines lightweight application with powerful security features to bring you a really efficient os on your computer. The routine hotfixes and updates make sure that your COMPUTER is up to date in hardware and software configurations while maintaining it at maximum security. However, Windows 10 comes with its disadvantages, and most of this are the various errors it throws during installation. One of these errors is error 0x8024200D that comes up when executing a Windows update.
The error code is also known as a WU_E_UH_NEEDANOTHERDOWNLOAD error, which means that the installer needs more data to be downloaded. This could be related to some Windows Update service problems, antivirus dispute, damaged upgrade components, and similar problems.
While it most commonly takes place during the installation of Fall Creators Update (V-1709), Anniversary Update and Creators Update are not immune to the issue. Although all these three updates were released a long time ago, they keep failing with various alphanumeric codes during the download or installation process.
Fortunately, there are few ways that can be used to fix 0x8024200D error manually. Let’s have a look at them.
Method 1: Delete the current downloaded update and Download the Windows update files again
Since the error shows up after downloading the update, it is obvious that the downloaded files are the ones that are corrupt, or you are unsure about what is missing exactly, re-downloading the update will give you all files and replace the corrupt ones. You may need to boot in safe mode for the first step (deleting current corrupt download).
- Hold down the Shift key and click the restart button in the Windows Start menu. This will bring up the troubleshooter when the system restarts.
- Select Troubleshoot when the computer boots.
- Select Advanced and then Startup Settings.
- Select Restart.
- Once the machine has rebooted, press F4 (the key may vary with your PC) to select Enable Safe Mode.
- Navigate to ‘C:\Windows\SoftwareDistribution\Download’ once your computer is in Safe Mode. This is where the downloaded update files are stored.
- Delete all the contents of that folder.
- Reboot your computer into normal mode.
- Navigate to Settings > Update & security.
- Select ‘Check for updates’ and run the update process again.
Method 2: Run Windows Update troubleshooter
Before opting for some complex methods, allow Windows update troubleshooter to try and fix the error. If nothing else, at least we’ll get to know what measures to take later. You can use a built-in troubleshooter, but it is advised that you download and run the special tool from Microsoft’s official site.
- Download the Windows Update troubleshooter here.
- Save the file.
- Run the troubleshooter and wait for the process to finish.
- You’ll be informed if the problem is resolved.
Method3: Uninstall third-party antivirus
Third-party antimalware software have a huge impact on updates. It seems that those two are not functioning well for different reasons. Firstly, your antivirus can accidentally delete or block some of the update files. Or make a conflict with Windows Defender. That battle for supremacy over your PC security can prove fatal for both updates and all-around system performance.
Because of that, we advise you to uninstall antivirus before updates and lower the chances of something going wrong. Have in mind that you can reinstall your antivirus software after the updating procedure is finished.
Method 4: Uninstall peripheral drivers
Issues with Windows 10 update and legacy drivers are well-known. The conflict that may occur will not just prevent the updates, but affect system stability and eventually lead to errors and crashes. Because of that, follow these instructions:
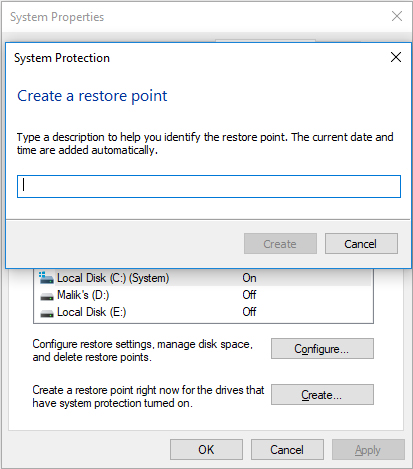
- On Search Windows, type Create a restore point.
- Open System properties.
- In the System Protection tab, on the bottom of the list, click Create.

- Enter the description and create a restore point.
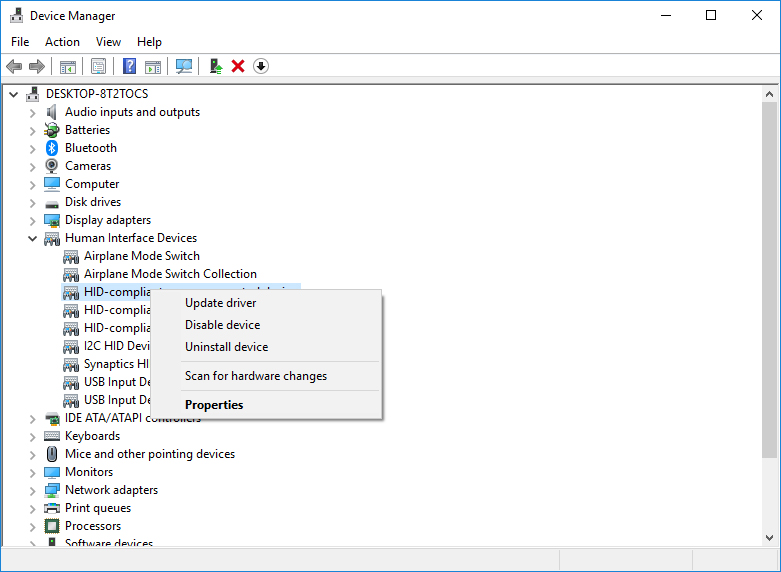
- Now, right-click Start and open Device Manager.
- Unplug all peripheral devices except the mouse and the keyboard.
- Go to their respective drivers and uninstall them one by one (printer, scanner, webcam etc.).
- Restart your PC and try updating again.
- After the update, reinstall drivers.
Method 5: Remove temporary installation files
- Press Windows key + R, type cleanmgr, and press
- When Disk Cleanup opens, select C: drive and click
- Click on the Clean up system files
- Select the files you want to delete, including
Recycle Bin
Temporary Internet Files
Temporary Files
System error memory dump files
Previous Windows Installation
Temporary Windows installation files
Windows Setup temporary files
- Then click OKand Delete Files
- Finally, reboot the system and try to install the update one more time.
Method 6: Run SFC (System File Check) scan
Running the system file check application will find all the missing or corrupt files and replace them. We are going to use the elevated or administrator mode command line tool to run this scan.
- Press the start key or start button and immediately type “cmd”
- Right click on the cmd application from the search results and select “run as administrator”
- In the command prompt window, type this line “C:\WINDOWS\system32>sfc /scannow” and hit Wait for the scan to complete.
Method 7: Restart Windows Update components
- Right-click on Windows key and select Command Prompt (Admin).
- Click Yes on the UAC and enter the following commands in the Command Prompt window (all at once).
net stop wuauserv
net stop cryptSvc
net stop bits
net stop msiserver
ren C:\\Windows\\SoftwareDistribution SoftwareDistribution.old
ren C:\\Windows\\System32\\catroot2 catroot2.old
net start wuauserv
net start cryptSvc
net start bits
net start msiserver
pause
- Now close Command Prompt and reboot your PC.
Check if the error has been fixed.
Method 8: Use batch script to reset Windows Update components
There are a few processes you’ll probably want to reset when trying to fix the update issues. Apart from this, you’ll probably need to rename/delete the folder with update installation files. you can do that either manually or through the batch script file developed by Windows geeks.
Follow these instructions to employ batch and resolve various update issues.
- Download the batch file from here.
- Save the file on the desktop.
- Right-click on batch and Run as Administrator.
- After the process is finished, try updating again.
Method 9: Use DISM to repair update files
Besides the restarting the update components and SFC scan, you can also try to fix the update files corruption. And the good thing is that you don’t have to use third-party programs. DISM is a built-in tool that scans health of update files and fixes possible corruption while restoring the deleted files.
- You can use DISM to repair your system update files this way.
- Right-click Start and open Command Prompt (Admin).
- In the command line type “exe /Online /Cleanup-image /Restorehealth”
- Press Enter to start the procedure.
- Wait for the process to finish and try updating again.

 (49 votes, average: 4.62 out of 5)