PFN means Page Frame Number. It is a list used by the Hard disk to find every file on the physical disk. The list can be damaged for many reasons, a few of them may occur once in a lifetime and others can be consistent and need to be repaired. Here are some reasons that we will be covering:
– Virus and Anti-virus problems.
– Your OneDrive app and service need to be closed down.
– Your Windows version needs to be upgraded.
– Hard disk problem.
– Some drivers got old or faulty and need to be upgraded.

pfn_list_corrupt error
Methods to get rid of ‘pfn_list_corrupt’ Error
Method 1: Check for faulty RAM
We can use Windows Memory Diagnostic tool to check for faulty RAM.
1. Press the Windows + R key to launch the Run box.
2. Type mdsched.exe and click OK.
3. Click Restart now and check for problems.
4. Now the Windows Memory Diagnostics Tool screen pops up. You can leave it alone and come back to see the results in a few minutes.
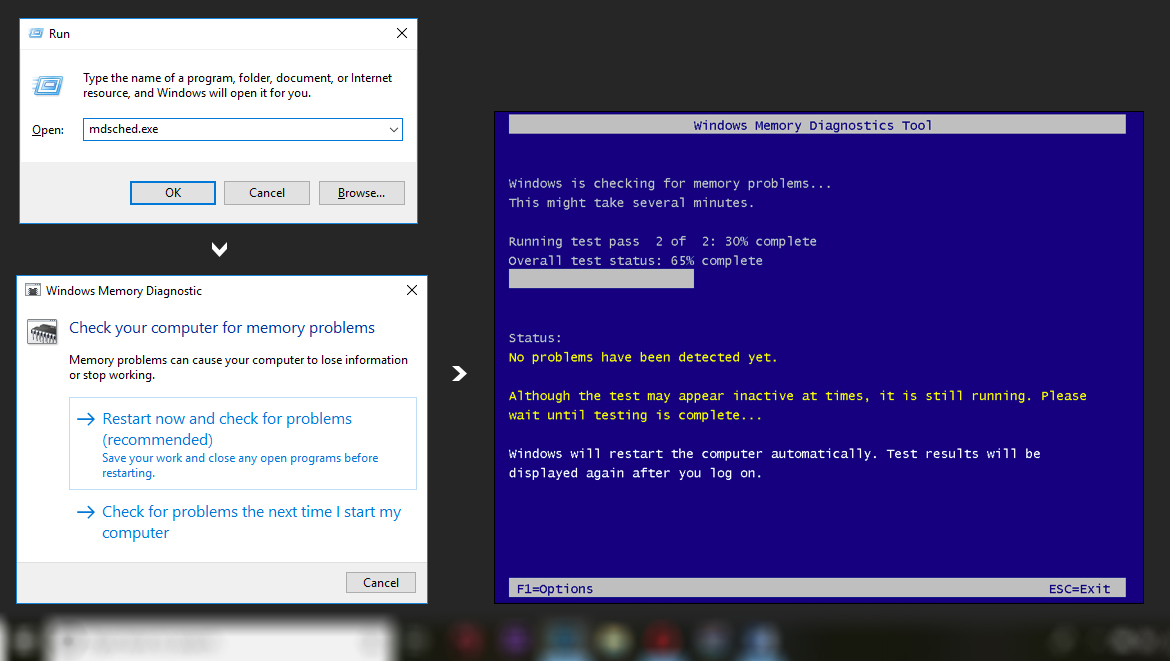
5. Reboot your Windows and see if the blue screen is gone.
Method 2: Run a system scan
System scan is a great command which scans all the system files and checks if something is corrupt or missing and immediately fixes it. It really saved me lots of time and effort through my work and I really recommend that you keep it in mind and use it in any situation. Here’s how to apply it:
1. Type “cmd” in your start menu, right-click on Command Prompt and choose Run as administrator.
2. Click Yes to give it permission.
3. Type “sfc /scannow“ and press enter.
(make sure you put a space between “sfc” and “/scannow”)
Wait until the scanning and the fixing are done and that’s when you should restart your computer and see if you still encounter the Blue screen.
Method 3: Check for hard drive corruption
1. Find and right-click on Command Prompt from the Start menu. Then choose Run as administrator.
Click YES when prompted by User Account Control.
2. Type chkdsk /f in it and press Enter.
3. It will start scanning for hard disk corruption and automatically fix the error.
Method 4: Use the Windows 10 blue screen troubleshooter
Microsoft has released a troubleshooter specifically for blue screens in the last two versions of Win 10. It’s worth a shot! Here’s how to use it:
1. Open Settings from your start menu.
2. Click on Update & Security.
3. Select Troubleshoot from the left pane and then click on the Blue Screen troubleshooter.
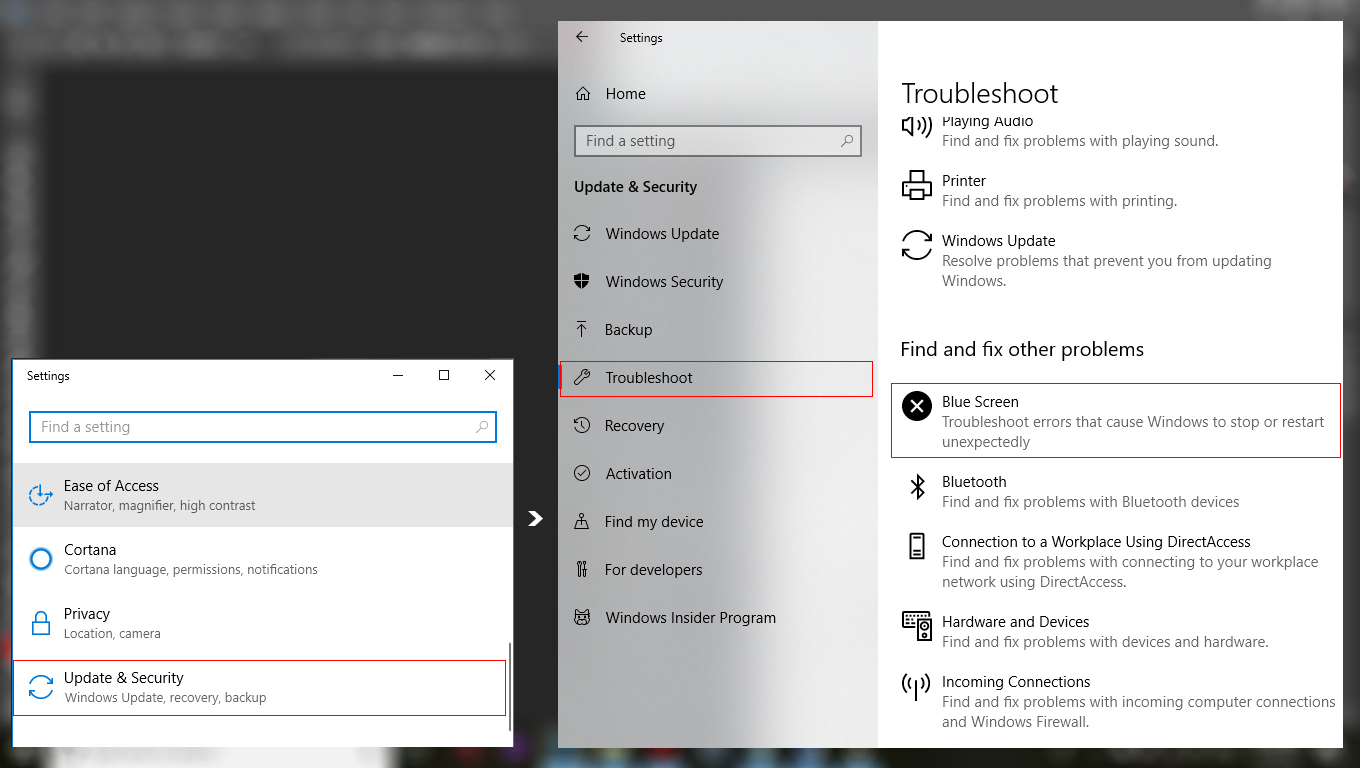
4. Click Run Troubleshooter to start using it. Give it some time to detects your problem.
If the troubleshooter manages to find any issues, then click on Apply this fix.
After it finishes fixing the problem just click Close the troubleshooter and restart your computer.
Method 5: Disable OneDrive
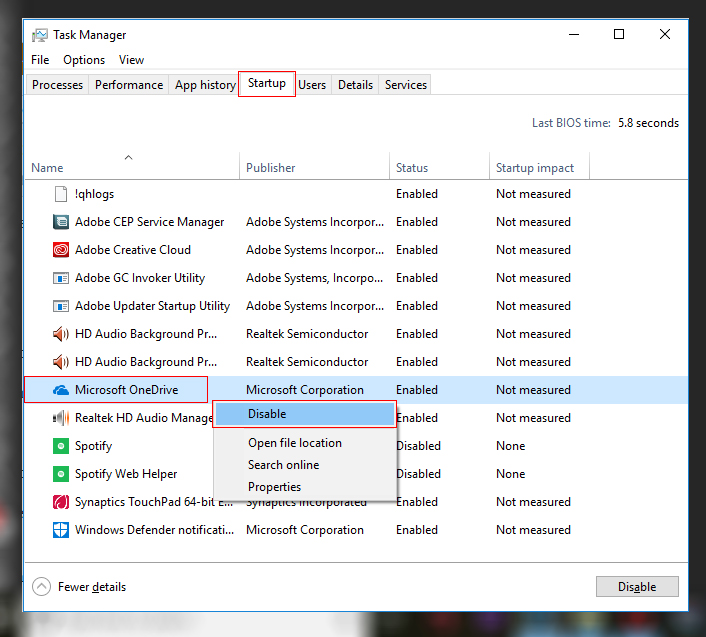
1. Open task manager from your taskbar or by pressing Ctrl + Shift + Esc.
2. If you see the small panel, click More details to switch to the big panel.
3. Open the Startup.
4. Look for Microsoft OneDrive, right-click on it and select Disable.
If you are using Windows 10 Pro, Enterprise or Education, then you will need to make sure it’s disabled at the group policy. Follow these steps to do so:
1. Press the Windows key + R or type Run in your start menu and choose Run.
2. Type “ msc“ and click Ok.
3. Navigate to this path: Computer Configuration > Administrative Templates > Windows Components > OneDrive and double-click on Prevent the usage of OneDrive for file storage.
4. In the dialog box that appeared, select the Enabled button then click Apply followed by Ok.
Give the computer a restart now and you will see that OneDrive service is gone and so will your problem if OneDrive was the reason behind it.
Method 6: Free up space and Remove Temporary Files
1. Open the This PC page where all your drives lie, right-click on your C: drive and choose Properties.
2. Click the Disk Cleanup button.
3. Select only Temporary files and Old Windows files if found then click Ok.
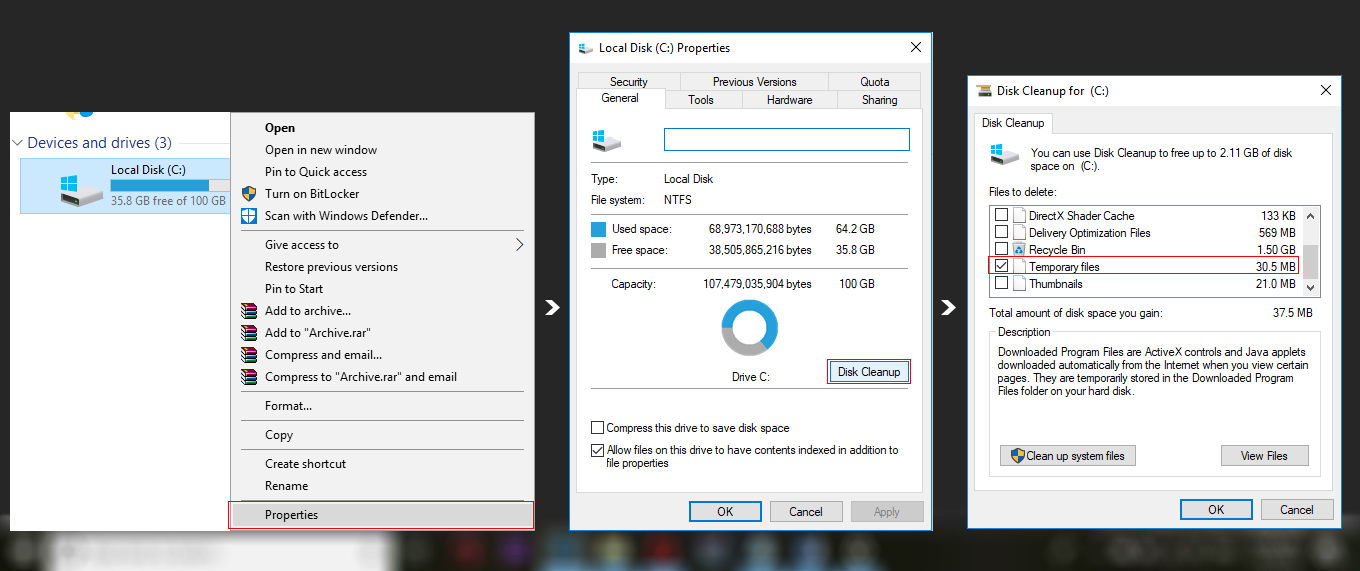
4. Click Delete files to begin the cleaning process.
5. Now reboot your computer.
Method 7: Restore your PC to a previous point
1. Open Control Panel and search for recovery.
2. Open System Restore.
3. Click Next.
4. Choose a previous restore point and click Next.
5. Click Finish.

 (219 votes, average: 2.05 out of 5)