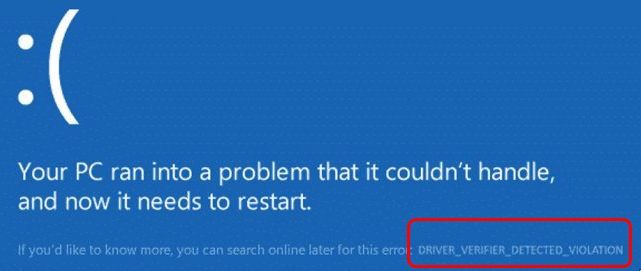
Fix DRIVER_VERIFIER_DETECTED_VIOLATION Error
Every version of Windows operating system comes with Driver Verifier built in. The major function of the driver verifier is monitoring some of your Windows drivers. When it detects a driver issue, it will immediately cause a BSOD (blue screen of death) error. DRIVER_VERIFIER_DETECTED_VIOLATION is the common one of them. Due to the BSOD error, your computer would get into restarting the loop problem. As a result, you cannot use your computer properly.
Method 1: Disable & Reset Driver Verifier
If unluckily after solving the driver problems, the error still occurs, try to disable and reset the Driver Verifier on your Windows 10.
You need to do these:
1) Type cmd in the search box from Start menu. Then right-click on Command Prompt to choose Run as administrator.
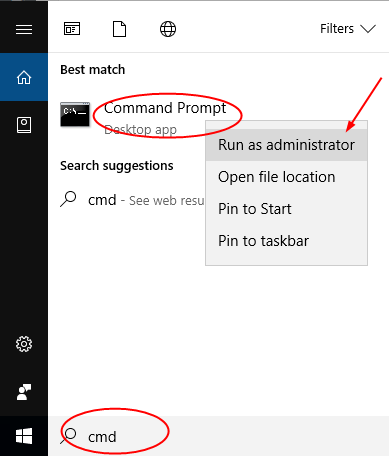
Note: Click Yes when prompted by User Account Control.
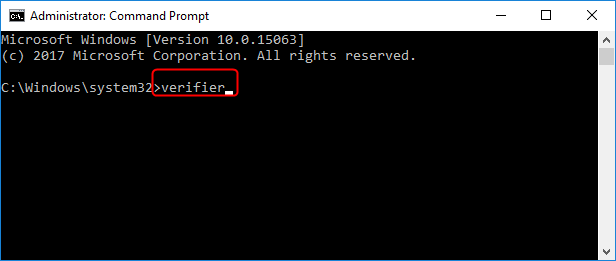
2) On the open black window, type verifier and press Enter.
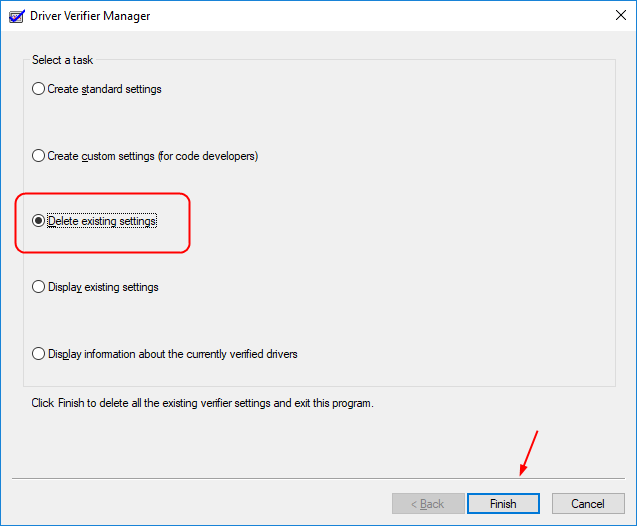
3) Now the Driver Verifier Manager would be open. Tick on Delete existing settings and click Finish
 .
.
4) Reboot your Windows 10 and the Driver Verifier would be disabled now.
The BSOD error should be solved, but if not, go on to follow the steps below to reset the verifier.
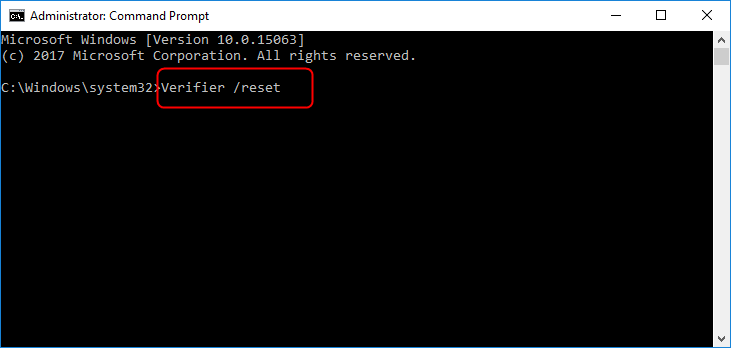
5) Run Command Prompt as administrator again via the same step 1).
Then type Verifier /reset in the window and press Enter to run it.
6) Reboot your Windows 10.
Method 2: Update your device drivers
The error can often be also caused by outdated or incompatible drivers. If reinstall your graphics card driver didn’t help you fix it, please update other device drivers.
Keep your drivers up-to-date can make your Windows 10 run stable. It’s fairly simple. As the first option, you can choose to update them in Device Manager.
- Right-click on the drivers that need to be updated.
2. Then click Update driver.
3. Go on to choose Seach automatically for updated driver software.
Then Windows will search the update for you automatically.
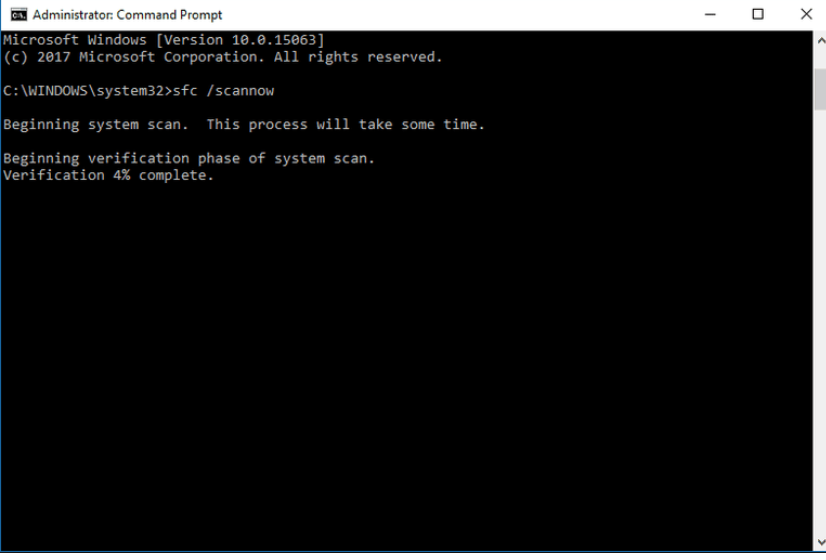
Solution 3: Run the SFC scan
you will have to run a windows utility feature sfc/scannow. To do so:
- Open the command prompt with administrator privilege.
- Open Start Menu and right click on Command Prompt -> Select Run as administrator.
- After opening the command line, type sfc/scannow

- This command will take a few minutes to scan your PC.
- Once the execution gets completed, close the command prompt.
Solution 4: Run the DISM
Similar to SFC scan, DISM (Deployment Image Servicing and Management) is also a built-in tool for resolving various system errors within Windows. But a more advanced one. So, if the SFC scan failed to resolve your problem, there’s a good chance DISM will get the job done.
Here’s how to run DISM in Windows 10:
- Press Windows key + X and run Command Prompt (Admin).
- Copy and paste the following command on the command line:
- DISM.exe/Online /Cleanup-image /Restorehealth
- In case the DISM can’t obtain files online, try using your installation USB or DVD. Insert media and type following command:
DISM.exe /Online /Cleanup-Image /RestoreHealth /Source:C:\RepairSource\Windows /LimitAccess
- Be sure to replace ”C:\RepairSource\Windows” path of your DVD or USB.
Method 5: Check for hardware failures
And the last ‘tweak’ you should try is checking for hardware failures. Here’s how to do that:
- Go to Search, type run, and open Run
- In the Run window, enter the following command and press Enter: mdsched.exe
- Wait for the process to finish
- Restart your computer.

 (58 votes, average: 4.82 out of 5)