Skype facing problems with playback device can be really annoying because you won’t be able to hear the other person during a call, but mentioned below are some methods that can solve this issue.
Methods to fix Skype problem with playback device in Windows 10
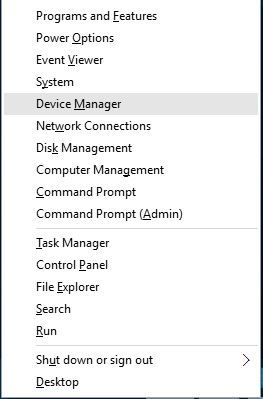
Method 1: Delete Audio Device
- Launch Device Manager rom the list (Windows button + X).

- Navigate to Sound, video and game controllers section and look for your audio device.
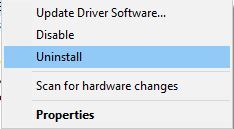
- Right-click on the audio device and hit Uninstall.
- As soon as you’re done uninstalling, restart the PC and Windows 10 should install it automatically.
- Check if the issue is fixed.
Method 2: Ensure that the correct playback device is set in Skype
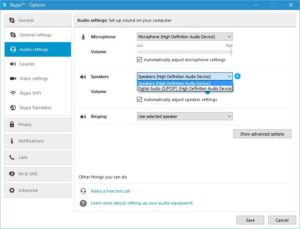
- Run Skype and navigate to Tools > Options.
- Go to Audio settings and expand Speakers menu.
- Select the appropriate audio device and hit Save to save changes.
- Check if the issue is solved. You might have to try several different audio devices before you find the one that works for you.
Method 3: Reset Skype configuration files
- Shut down Skype.
- Open run command (Win + R keys) and type %appdata%. Hit Enter.
- Look for Skype folder and change its name to Skype.old. Changing the name will lead to deletion of the Skype messages history but it will be available in the skype.old folder.
- See if the problem still exists.
Method 4: Run Audio Troubleshooter
The last option is to take help from Windows inbuilt Audio troubleshooter. To do so:
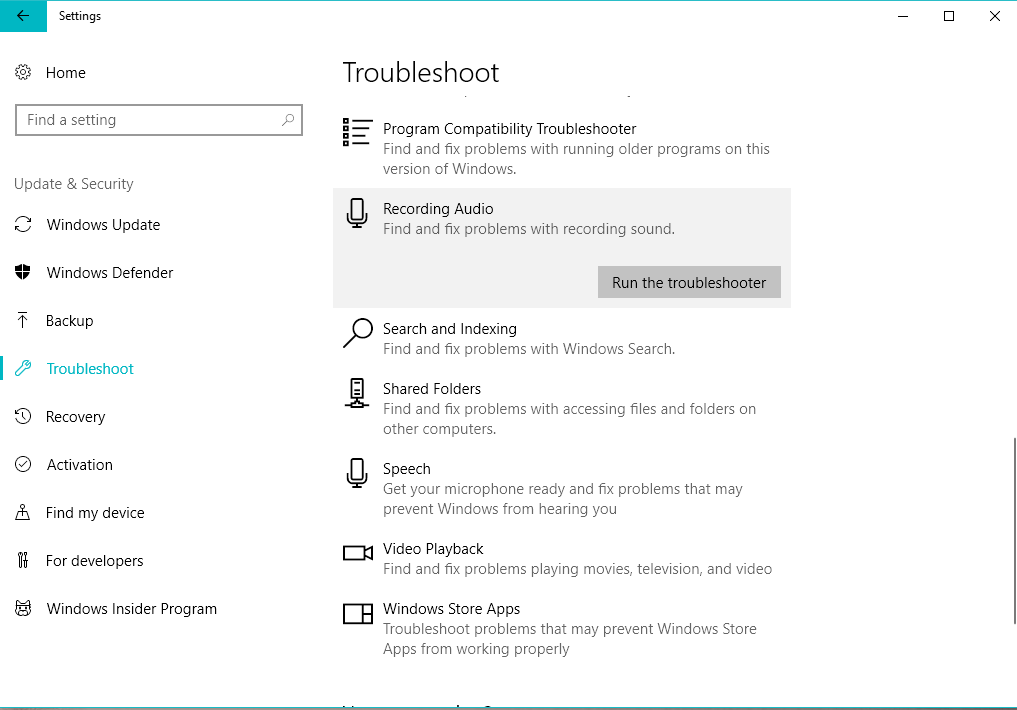
- Enter the Settings app.
- Go to Updates & Security > Troubleshooting.
- Look for Recording Audio and select it.
- Now, go to Run the troubleshooter.
- Follow the on-screen instructions and wait for the troubleshooter to find any issues.
- Restart your computer.
Rate this Article: 

 (24 votes, average: 1.79 out of 5)
(24 votes, average: 1.79 out of 5)