The STOP 0x0000008E errors are usually caused by memory hardware failures and more rarely by device driver issues, viruses, or hardware failures other than your RAM.
The STOP 0x0000008E error will always appear on a STOP message, more commonly called a Blue Screen of Death (BSOD). One of the errors below or a combination of both errors, might display on the STOP message:
STOP: 0x0000008E
or
KERNEL_MODE_EXCEPTION_NOT_HANDLED

STOP 0x0000008E BSoD Error
Many users have reported that they got STOP: 0x0000008E and the Blue screen while viewing contents of a CD/DVD, playing a game and after installation of Windows service packs.
Methods to Fix STOP 0x0000008E Error
Remove New Hardware
If you have installed any new hardware or made any changes to your hardware then that might be causing the STOP 0x0000008E Error.
It is possible that the new hardware is not compatible with your RAM or Motherboard. To solve the error try to remove or reconfigure the newly installed hardware.
Ensure that the RAM is properly installed
Considering that the hardware of your computer may be causing the error 0x0000001a, you will have to unplug the RAM from your motherboard and clean it properly and re-insert it as it was inserted earlier. (Clean the RAM slot also). Make sure the RAM is installed as instructed by the motherboard manufacturer.
Try a Different RAM
If possible, borrow another RAM from a friend of yours or ask for a spare RAM from a local dealer just for checking purpose. It might be the case where your motherboard isn’t compatible with your RAM and getting another RAM may fix the issue.
Boot In Last Known Good Configuration
This should be the first thing that you should try, as it is the easiest and most effective solution to fix the Stop error 0X00000024. Follow the steps below:
- Restart the computer.
- Wait for the computer to complete the POST process (system information appearing on your screen).
- Quickly press the F8 key repeatedly until you see a list of boot options available.
- Choose Last Known Good Configuration (your most recent settings that worked).
- Press Enter
- Wait for your computer boot into this mode.
See if the error still exists or not. If you still face the error try the next method.
Perform a Memtest
The Memtest allow users to set up a USB as bootable device so they can scan their RAM for errors without running any operating system.
- Download memtest from here.
- Run the installer, select your USB and click Create and make sure that the Format Drive option is selected else you may get errors.
- Reboot your computer, and press F11 to get into bios, If F11 doesn’t work then read the instructions online for your system to see which key can get you into BIOS to boot from USB to select manually from which device to boot.
- Select your USB Flash Drive from the list.
- Memtest will automatically start and check your memory for errors.
If memtest’s results come with some errors, then it’s time for you to replace your Pc’s RAM.
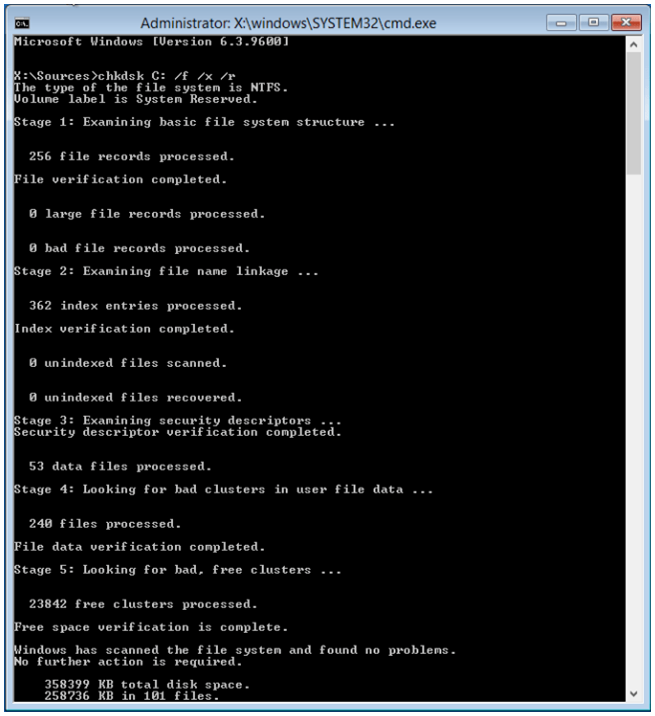
Check Your Disk with Chkdsk Utility
If the hard drive has its file integrity compromised, it is possible to use built-in Windows CHKDSK utility to scan the disk and fix the file system errors.
Here are the steps to run CHKDSK:
- Boot from your Windows install disc.
- Click on Repair your computer after selecting proper language, time and keyboard input.
- Select the Windows installation drive, which is usually C:\ , and click Next.
- Choose Command Prompt when the System Recovery Options box appears.
- Write “chkdsk: /f /x /r” and press Enter.
Replace C: with the letter of the driver where Windows is installed.
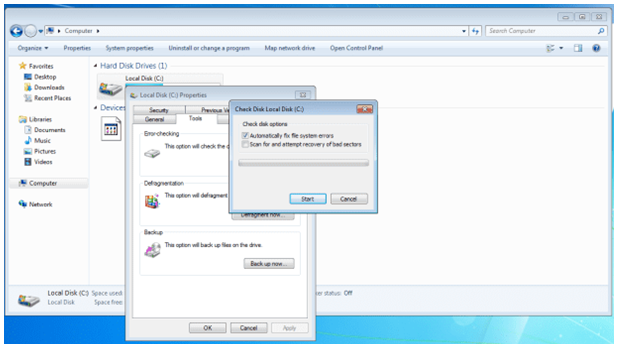
Automatically Fix File System Errors
Try checking the volume for error in the file system. Here are the steps to access Error-checking panel in Windows:
- Open My Computer
- Right click on C:\, where your Windows version is installed, and select Properties
- Select the Tools tabs from the window
- The first item is “Error-checking” where you need to click on “Check Now..”
- Make sure to have the Automatically fix file system errors option is checked
- Click Start
Uninstall Ram Consuming Program
If you have installed any program recently and getting this error after that, try to uninstall the program first and then restart the pc to check if the error occurs or not. If this is the case, it is recommended to increase the ram of the PC.
Perform A System Restore
The last solution that you can attempt is doing a system restore. System Restore enables your system to return to an earlier state. So some content of your system, like system settings, some programs, the registry, will be impacted. However, your individual files and data will not be altered.
- Press Win+ R (Windows logo key and R key) at the same time to invoke a run box.
- Type rstrui.exe and click OK. The System Restore Window will open.
- Click next then you might see the following screen.
- Select a restore point produced prior to the error occurred. You can distinguish the created Date and Time. Click next to continue and follow the on-screen instructions to complete the restore.

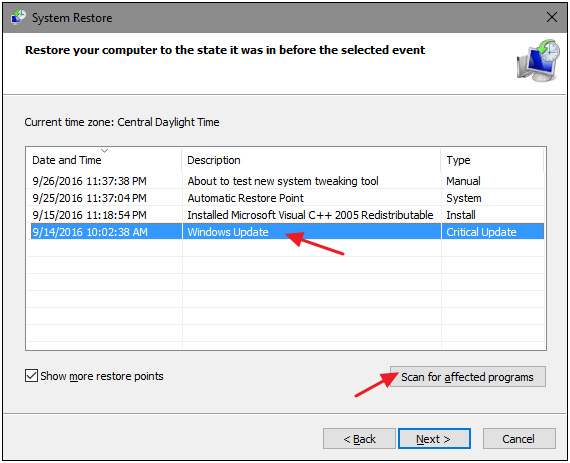
- Restart your PC and check to see if the blue screen is gone.
That’s it.

 (58 votes, average: 4.75 out of 5)