Sometimes Chrome stops opening certain website which we want to visit, which could be very annoying. Instead, the Chrome browser show you an error: Err_Connection_Refused and it states that This webpage is not available.
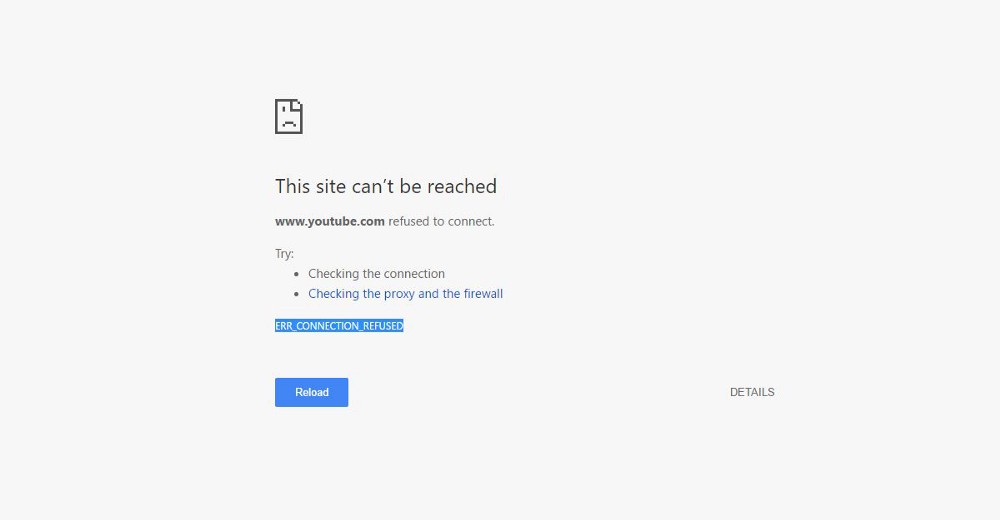
Here are some possible reasons of ERR_CONNECTION_REFUSED error:
- Website is Down.
- No Internet Connection.
- Change in the LAN settings.
- Website blocked by Firewall or Antivirus.
- Cache or Cookies not cleared.
- Browser not updated.
You can try the methods given below in order to fix this problem.
Method 1: Check Your Internet Connection
Before trying anything first check your network connection status. Check whether you are connected to the Network you intent to connect with. Also, check if your internet router is correctly configured.
Method 2: Clear Browsing Data
Cookies and caches can terminate your network connection. So, clearing them will resolve the issue related to your internet connection.
- Open your Chrome, and then enter chrome://settings/clearBrowserData in the address bar.
- Choose to clear data from the beginning of time. Tick all the items. Then hit Clear browsing data.
- Your browsing data is cleared. Now go and check if this fixed the problem.
Method 3: Reset Your IP Address and Clear DNS Cache
- Open Command Prompt (Admin).
- Type the following commands and hit Enter one by one to run them on the pop-up window.
netsh winsock reset catalog
ipconfig /flushdns
- After it’s done, restart your computer. Then check if the error still exists.
Method 4: Checking for LAN Settings
- Type Internet options in the search bar.
- Click on the Connections tab and after that click on LAN Settings button which is located at the bottom of the tab.
- Uncheck the Use a proxy server for your LAN options if it is already checked.
- Uncheck the other options also which are at the top.
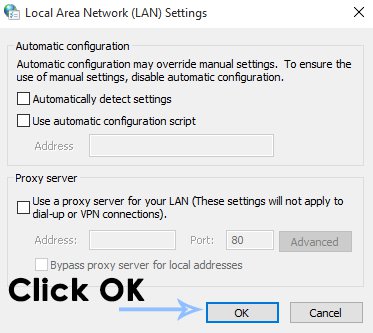
- Click on OK button and reboot your PC.
Method 5: Clear Browser Cache and Cookies
- Click on Settings or type chrome://settings/ in chrome URL bar.
- Click on Advanced > Content settings.
- Click on Cookies > See all cookies and site data
- Click on Remove All.
- A new popup will appear, click on CLEAR ALL.
- All your cookies and cache will be cleared
Method 6: Change DNS Address
- Type network in search box and then click on Network and Sharing Center.
- Click Change adapter settings.
- Right-click on Local Area Connection or Ethernet according to your Windows and after that choose Properties.
- Double-click on Internet Protocol Version 4(TCP/IPv4).
- Check Use the following DNS server addresses option and set the DNS server address to be Google public DNS:
8.8.8.8
8.8.4.4
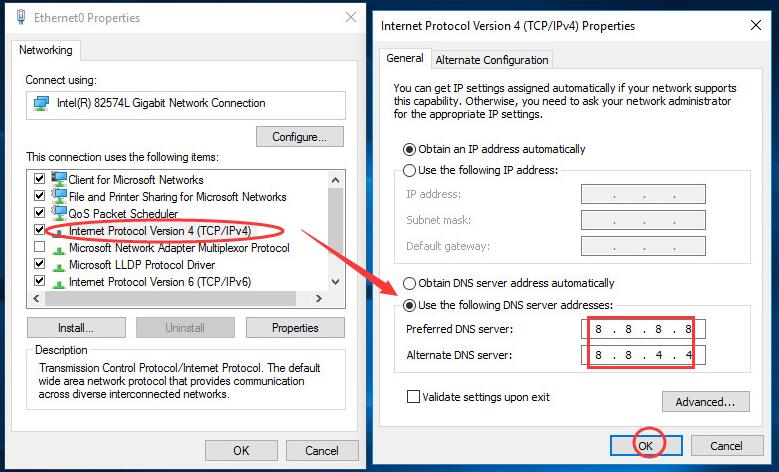
- Click OK.
Method 7: Disable Your Proxy
- Open Settings.
- Click Show advanced settings…
- Click Change proxy settings… under Network dialog.

- Click LAN settings on Internet Properties
- Make sure Use a proxy server for your LAN is unchecked.
- Then click OK.
Method 8: Update Chrome
- Click on Customize and Control Google Chrome button tab in the right corner.
- Hover mouse over Help.
- Click on About Google Chrome.
- Or type chrome://settings/help in chrome URL bar.
- Now Chrome will search for the recent update, and if it’s not up-to-date, it will automatically get updated.
- Relaunch Chrome.
Rate this Article: 
 (291 votes, average: 2.08 out of 5)
(291 votes, average: 2.08 out of 5)