Finding it difficult to access the web has been quite a common problem recently. When a user tries to access any webpage they end up seeing “Err_Name_Resolution_Failed” message.
The reasons can be many as far as this error is concerned. But the most common one is where an anti-malware program intervenes or incompatibility between recently installed software.
Methods to fix Err_Name_Resolution_Failed
Method 1: Change DNS
- Right click on the network option which you will see on the bottom right corner of your screen and select Open Network and Sharing Center.
- Click on the internet connection you are using.
- Click on Properties.
- Double-click on Internet Protocol Version 4 (TCP/IPv4) to change the DNS server.
- Click on Use the following DNS server addresses:and set the values as follows in the dialog box:
Preferred DNS server: 8.8.8.8
Alternate DNS server: 8.8.4.4
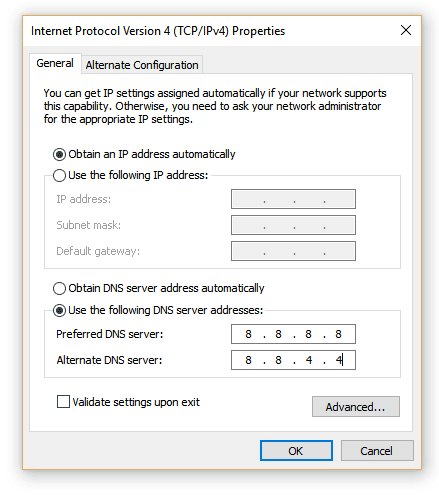
Press OK and exit.
Method 2: Use Netsh Winsock Reset Command
- Go to Start Menu and type cmd in the search box.
- Open Command prompt with Administrative Rights.
- Type the following commands and hit Enter after each one:
ipconfig /release
ipconfig /all
ipconfig /flushdns
ipconfig /renew
netsh int ip set dns
netsh winsock reset
- Reboot to apply changes.
Method 3: Reset Google Chrome
1. Launch the Google Chrome browser, type “chrome://flags/” in the address bar and press Enter.
2. Click Reset all to default option on the right side of the pane.
3. Launch Google Chrome again to see if you can access the internet now.
 (0 votes, average: 0.00 out of 5)