If you are on Windows 10 and trying to update your build to 14986 then you might face the Error 0x80242006.
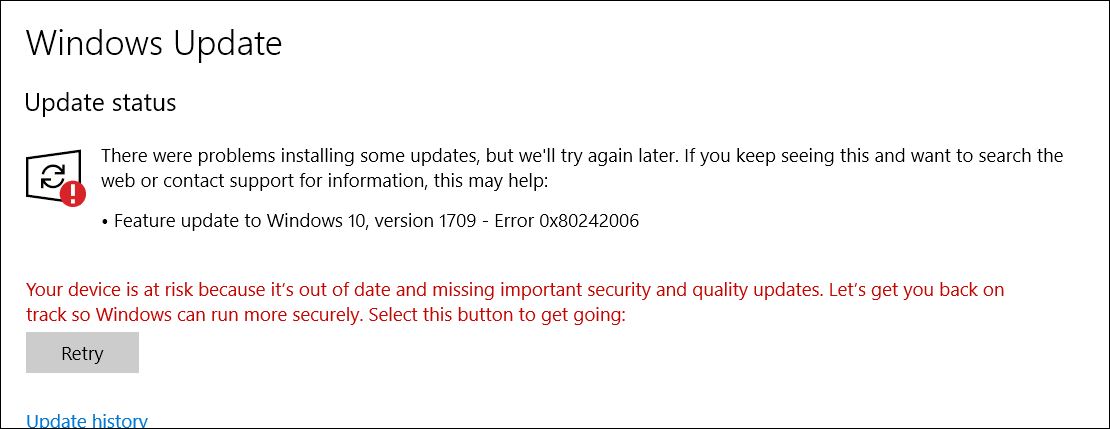
Error 0x80242006 – Windows Update
This error is quite common among the users trying this update and it can be caused by many things including Windows defender or stopped BITS.
Methods to fix Error 0x80242006
Method 1: Rename Update Folders using a Batch File
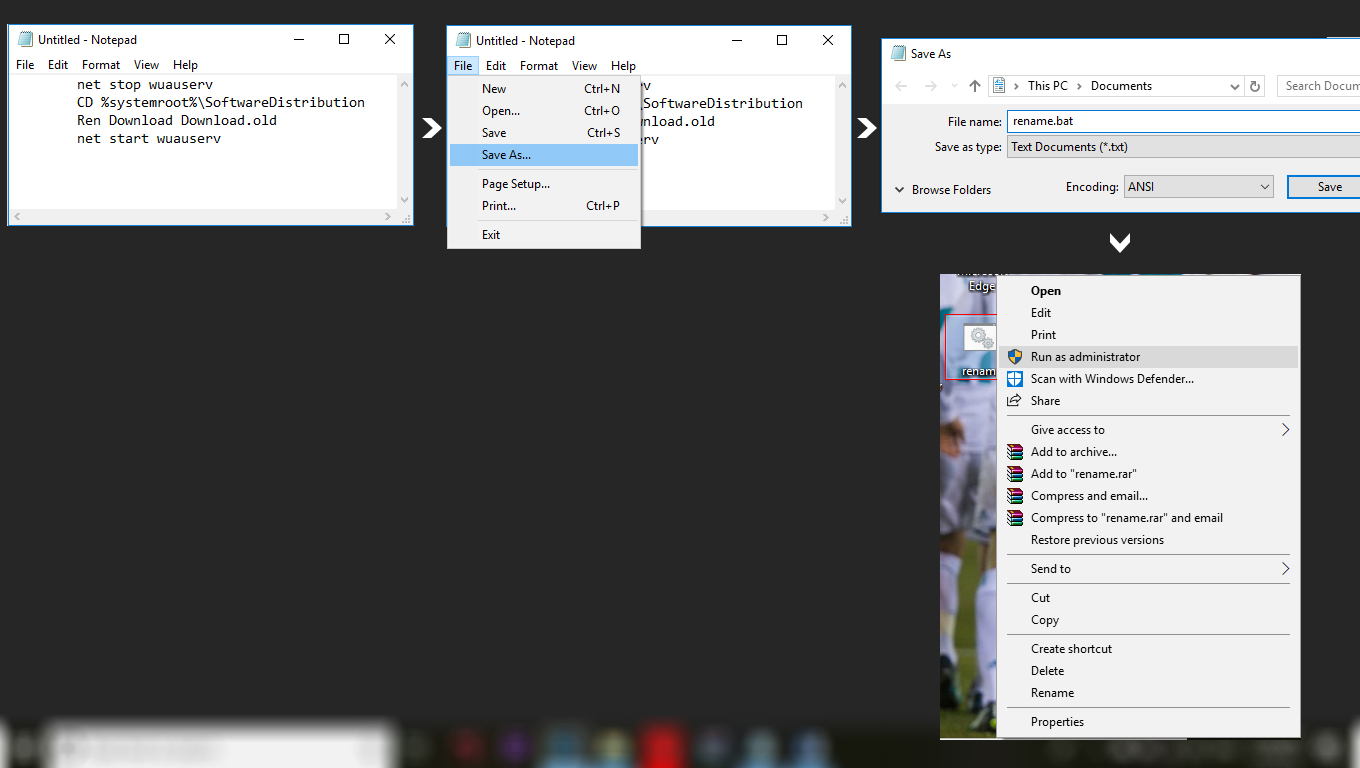
- Open Notepad
- Type the following code in Notepad:
        net stop wuauserv

        CD %systemroot%\SoftwareDistribution

        Ren Download Download.old

        net start wuauserv
- Click File then select Save As…
- Name your file rename.bat and press Enter.
- Now locate the file that you just saved and right click on it then select Run as Administrator.

- Let it run and try to update the Window once it is finished.
Method 2: Use Group Editor to address Windows Update
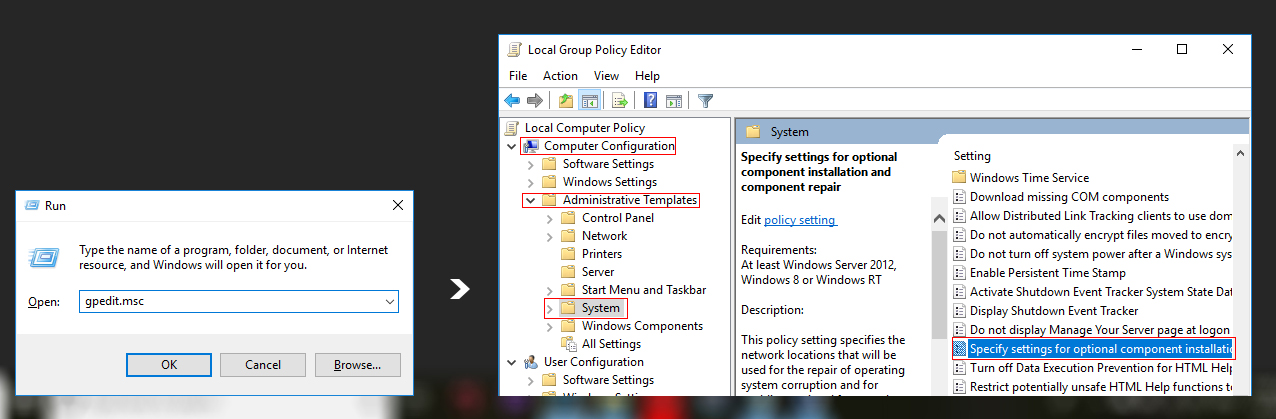
- Press Windows key + R, type gpedit.msc, and hit Enter.
- Select Computer Configuration and click on Administrative Templates.
- Open System and double-click on the Specify settings for optional component installation and component repair.
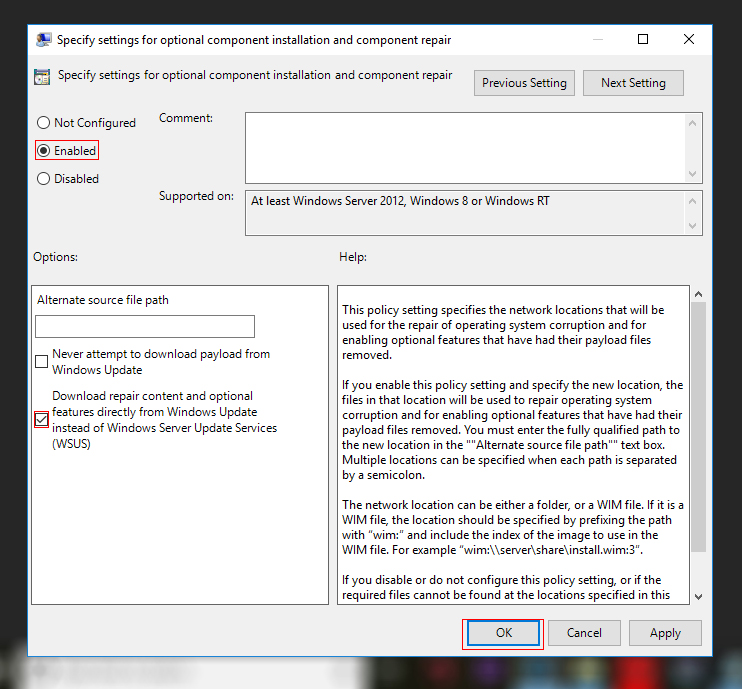
- Select Enabled and mark a checkbox next to Contact Windows Update directly.
- Finally, to save the changes, click Apply and OK.
Method 3: Reset Windows Update components
- Right-click onWindows key and select Command Prompt (Admin).
- Disable BITS, Cryptographic, MSI Installer, and the Windows Update Services. For this purpose, type the following commands in the Command Prompt window and press Enter after each of them:
net stop wuauserv
net stop cryptSvc
net stop bits
net stop msiserver
- After that, type the following commands to rename SoftwareDistributionand Catroot2 folders. Don’t forget to type Enter after each of them:
ren C:\\\\Windows\\\\SoftwareDistribution SoftwareDistribution.old
ren C:\\\\Windows\\\\System32\\\\catroot2 Catroot2.old
- Once done, enable BITS, Cryptographic, MSI Installer and the Windows Update Services(disabled before). This can be done by inputting the following command and pressing Enter after each of them:
net start wuauserv
net start cryptSvc
net start bits
net start msiserver
- Finally, close Command Prompt window and reboot your PC.
Method 4: Disabling Windows Defender and Enabling BITS
- Hold Windows key and press R(release the Windows Key).
- Type gpedit.msc and press Enter (If you don’t have gpedit.msc
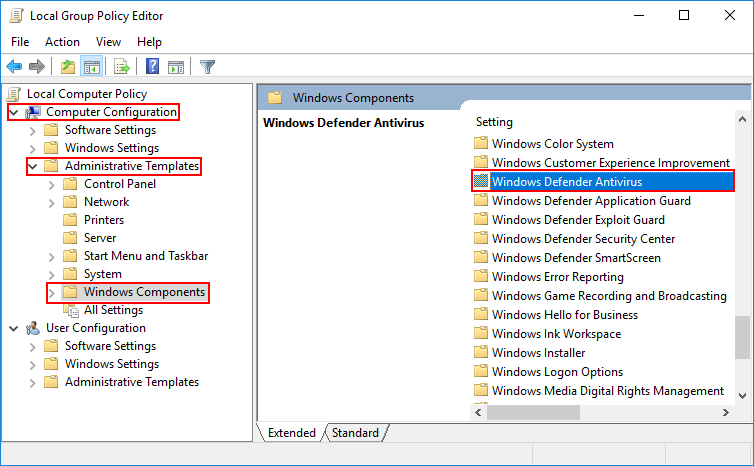
- Go to Computer Configurations > Administrative Templates > Windows Components.
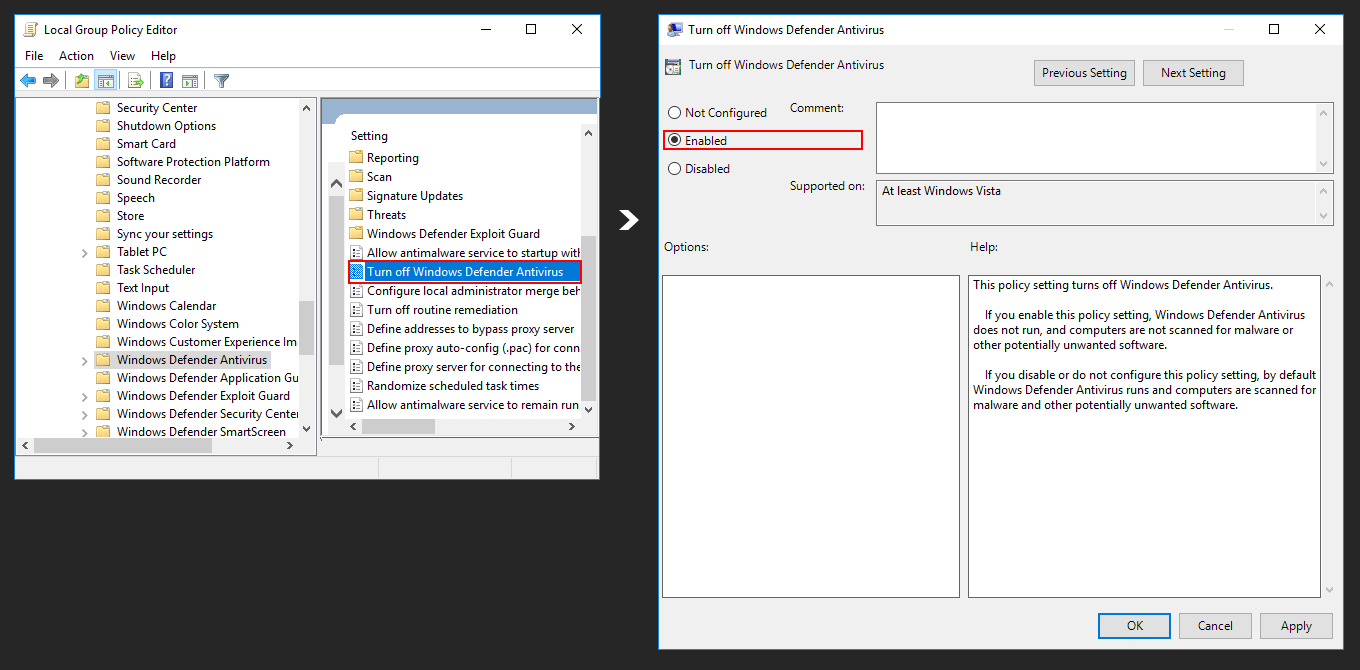
- Click Windows Defender and double-click Turn off Windows Defender
- Select the Enabled button and select Apply. Click Ok.
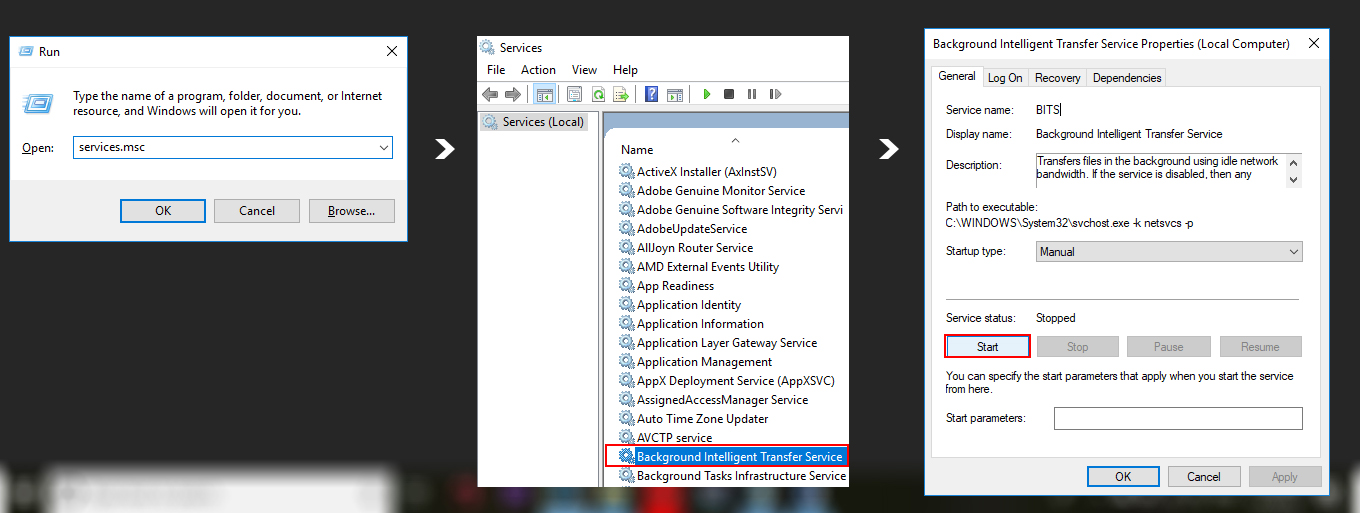
To manually start BITS
- Press Windows + R key simultaneously to launch Run Command.
- Type services.msc and press Enter
- Locate and double-click Background Intelligent Transfer Service BITS
- Click Start then click Apply and click Ok.
Method 5: Let the Command Prompt help you
- Right-click on Windows key and select Command Prompt (Admin).
- Alternatively, you can open Windows search and type Command Prompt.
- Right-click on the Command Prompt option and select Run as Administrator.
- Once the black Command Prompt window opens, copy and paste the following commands in it:
>WSReset.exe
>dism /online /cleanup-image /restorehealth
>dism /online /cleanup-image /StartComponentCleanup
>sfc /scannow
>powershell
>Get-AppXPackage -AllUsers |Where-Object {$_.InstallLocation -like “*SystemApps*”} | Foreach {Add-AppxPackage -DisableDevelopmentMode -Register “$($_.InstallLocation)\\AppXManifest.xml”}- Once these commands are executed, close CMD and restart your PC.
After that, try to download and install Windows 10 April 2018 update.
Rate this Article: 
 (47 votes, average: 4.77 out of 5)
(47 votes, average: 4.77 out of 5)