When you try to connect to the Microsoft Windows Update Website or to the Microsoft Update Website to install updates, you might receive the error code “0x8024402C”.
This sort of error message is normally triggered by poorly configured firewall program settings or wrong proxy setups which disable the connection to the Windows Update web server.
Resolving Error 0x8024402c
Method 1: Enable Automatic Detect Settings
- Launch Internet Explorer.
- Click the settings icon on the very top right.
- Then choose Internet options.
- Click LAN settings under Connection pane.
- Check on Automatically detect settings.
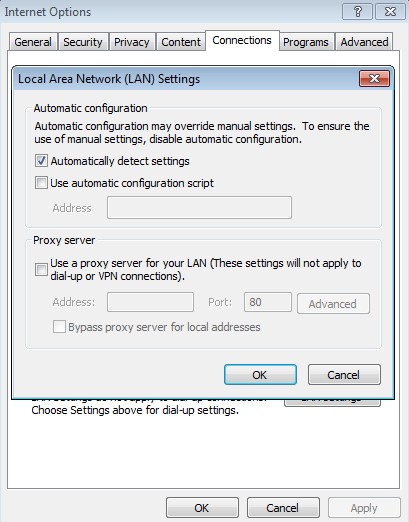
- Now try to install Windows Updates now.
Method 2: Change Your DNS Server
If the upgrading process failed due to your ISP (Internet Service Provider), you can just modify the default DNS web server to a public one to install the update properly. You can reverse the process quite effortlessly if something goes wrong.
- Use the Windows Key + R key combination in order to bring up the Run dialog box. Type “ncpa.cpl” and click OK.
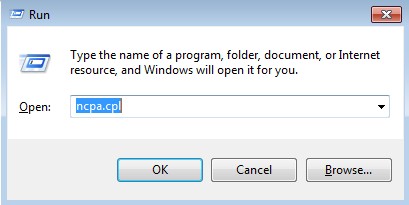
- This will open the Internet Connection window. Right-click on the Network Adapter you are using to connect to the Internet and choose Properties.
- Click on the Internet Protocol Version 4 (TCP/IPv4) option and choose Properties again.
- Navigate to the Use the following DNS server addresses settings and tweak it in the following manner:
Tweak the Preferred DNS server to 8.8.8.8
Change the Alternate DNS server to 8.8.4.4
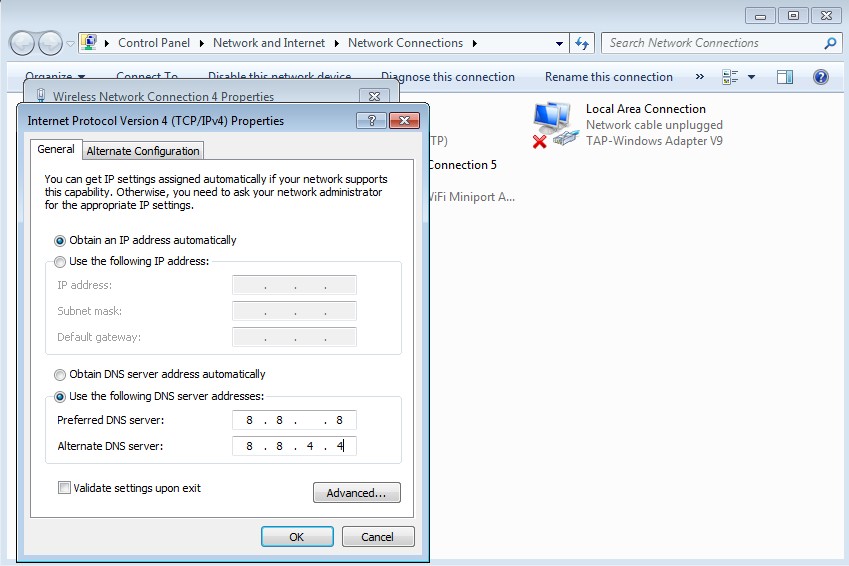
Note: This particular DNS server is a public Google DNS server.
- Check to see if the issue still appears.
Method 3: Configure Updates Client
- Open Run dialog box by pressing Windows logo key + R key together.
- Then type regedit in it and click OK.
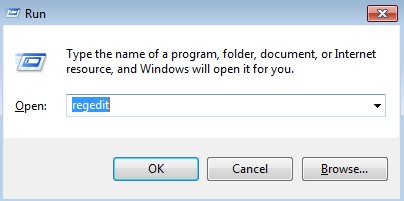
- Click Yes when prompted by User Account Control.
- On Regedit Editor window, head to HKEY_LOCAL_MACHINE > SOFTWARE > Policies > Microsoft > Windows > WindowsUpdate > AU

- On the right pane of AU key, double -click on UseWUServer, change its value data into 0.
- Then click OK.
Rate this Article: 
 (59 votes, average: 4.81 out of 5)
(59 votes, average: 4.81 out of 5)