Error 0xC1900101-0x20017 is a windows 10 installation error which shows up when upgrade/install to Windows 10 stops working.
Although Windows 10 is a free update for Windows 7 and Windows 8 users, occasionally the upgrade process isn’t really as smooth as you may assume. Some individuals have reported that they are receiving Windows 10 installation error 0xC1900101-0x20017. It says “The installation failed in the SAFE_OS phase with an error during BOOT operation” This error may likewise show up while aiming to upgrade from Windows 7 to Windows 8.
Fixing Error 0xC1900101 – 0x20017
Method 1: Create a Restore Point on your Windows
As we will be uninstalling some drivers from your COMPUTER, I will advise you to create a restore point on your Windows 7 or Windows 8.1 PC. Setting up a Restore point would take couple of minutes. When the restore point has been created, wage various other actions.
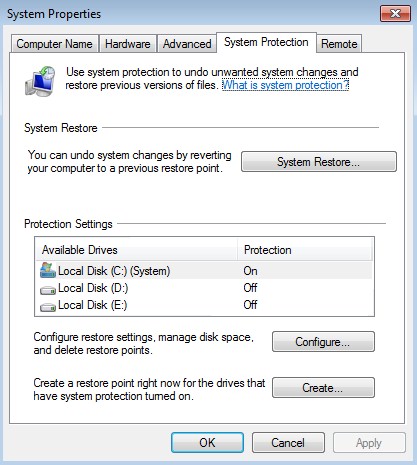
To create Restore Point, click on Start button, search for Restore Point, open Create a Restore point and wait until Windows creates a restore point. Restore point will come in handy if something goes or save you from the hassle of installing the drivers again if you were not able to upgrade to Windows 10.
Method 2: Uninstall Broadcom Bluetooth and Wireless Network Drivers
According to reports Broadcom drivers aren’t compatible with Windows 10, so if you’re using these drivers you might need to uninstall them before upgrading to Windows 10. To do so, do the following:
- Open Device Manager.
- Find your Bluetooth driver on the list.
- Right click the driver and choose Uninstall device.
- Repeat the process for wireless network driver.
Method 3: Disable Wireless from BIOS
Close all the program and turn off your PC. We will be disabling Wireless Internal Bluetooth and Internal WLAN from the BIOS.
When the COMPUTER is shut down, reboot it by pushing the power switch, however when you see the black screen start pressing F2 to bring the BISO Setups. Once you are in the BIOS Settings, do the following:
- Navigate to Advanced Tab using the right Arrow key.
- From the Advanced Tab, navigate or go to Wireless option using Down Arrow Key.
- Hit Enter to open Wireless option.
- Now you will see two options, Internal Bluetooth, and Internal WLAN. Disable both of them by hitting enter on them and then selecting Disabled.
- Exit the BIOS Settings by saving the changes. Press F10 to save the Settings.
Method 4: Remove Additional RAM
Now if you have added in additional RAM to your COMPUTER (not come with your Personal Computer), then you might have to remove it for a short time as well. For Dell users, removing RAM is simple, as you need to open the RAM compartment of your PC attached with a single screw and take out the RAM. You could locate it at the back of your PC, above the battery compartment. Various other COMPUTER users, kindly refer any quick guide on YouTube or see your Manufacturers site for more details.
This option may seem foolish to a couple of individuals, but it has actually worked for a couple of users. So give it a try.

 (50 votes, average: 4.44 out of 5)