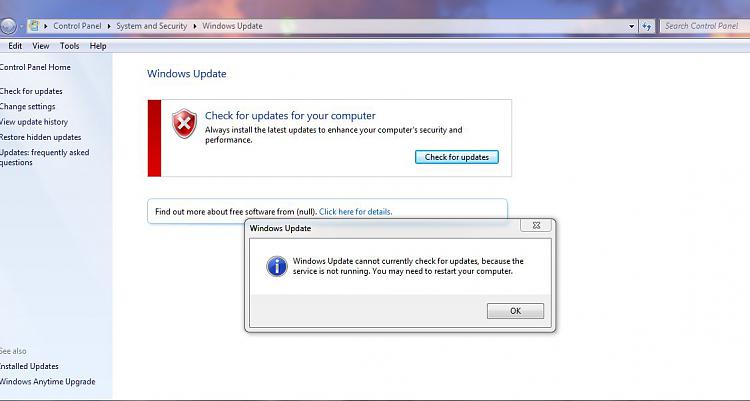
When you plan to update your Windows and you see the message: “Windows Update cannot currently check for updates, because the service is not running”, it becomes really irritating and your question is, why is this happening and what to do to solve this but don’t worry, we have answer to every question of yours.
Methods to fix Windows Update Service not Running
Method 1: Run Windows Update Troubleshooter
You can use Windows Update Troubleshooter. This built-in Microsoft solution is designed to automatically find and fix update issues in your OS.
Check out how you can run this tool in Windows 10:
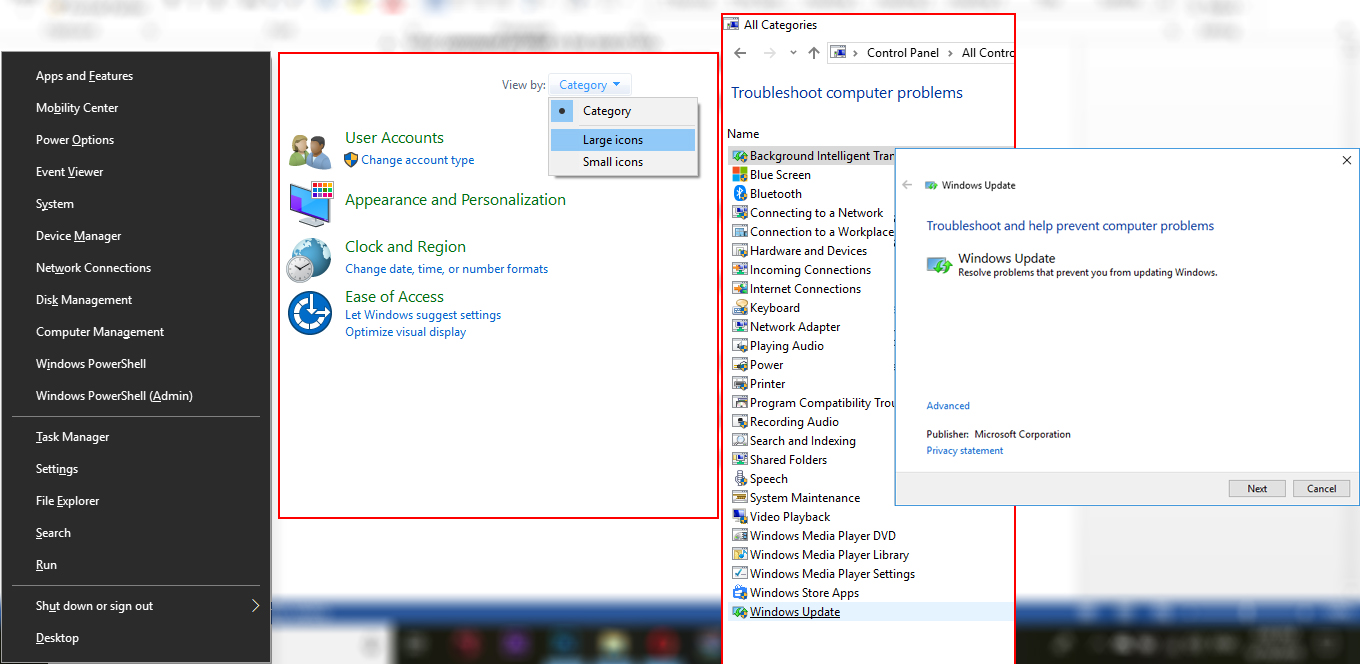
- Go to Control Panel
- Select Category and Choose Large or Small icons
- Select Troubleshooting and in the left pane, click on View all
- Locate Windows Update -> Select it -> Windows Update Troubleshooter will open -> Follow the on-screen prompts to resolve your problem
- Restart your PC for the changes to take effect and see if you can use Windows Update now
Method 2: Update Device Drivers
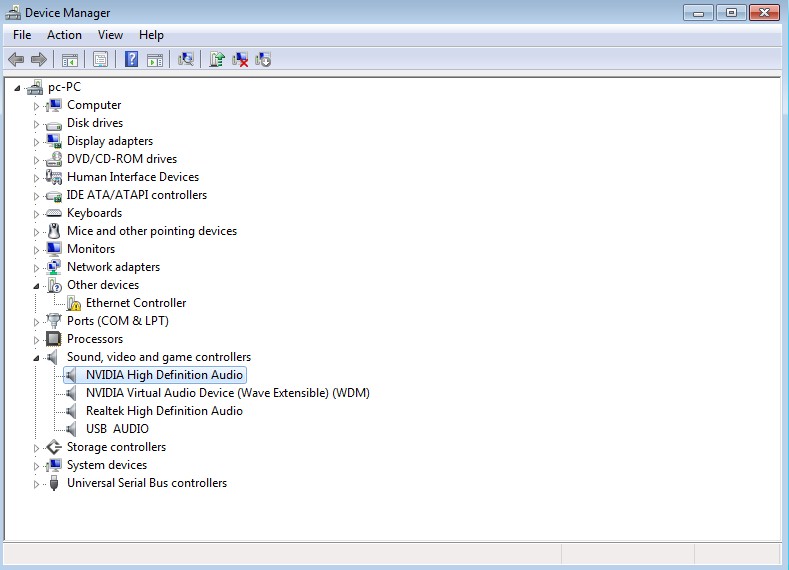
- Press Win key, type Device Manager and select the first option from the search results.
- Expand Sound, video and game controllers on the left side and select IDT High Definition Audio CODEC.
- Click Action tab and select Update Driver Software.
- After that, select Browse my computer for driver software and select High Definition Audio Device driver from the list.
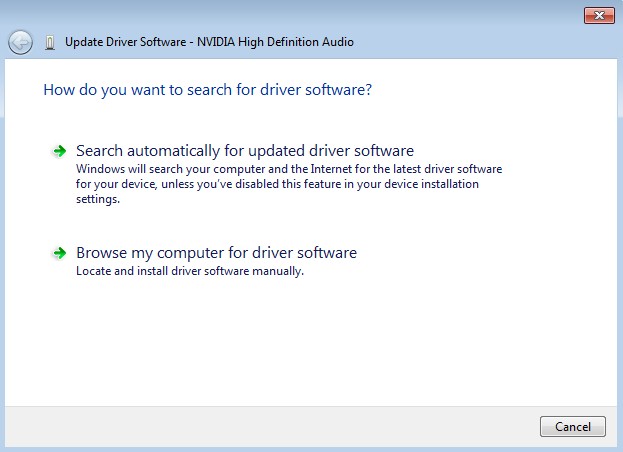
- Click Next and then Yes.
- When the process is finished, restart your PC.
(Note: The steps above show how to update audio drivers but these steps can be used to update any driver you want.)
Method 3: Restart your Windows Update associated services
You may get the service not running error because the services associated with your Windows Update are disabled. You should restart those services and see if this fixes your error. To do so:
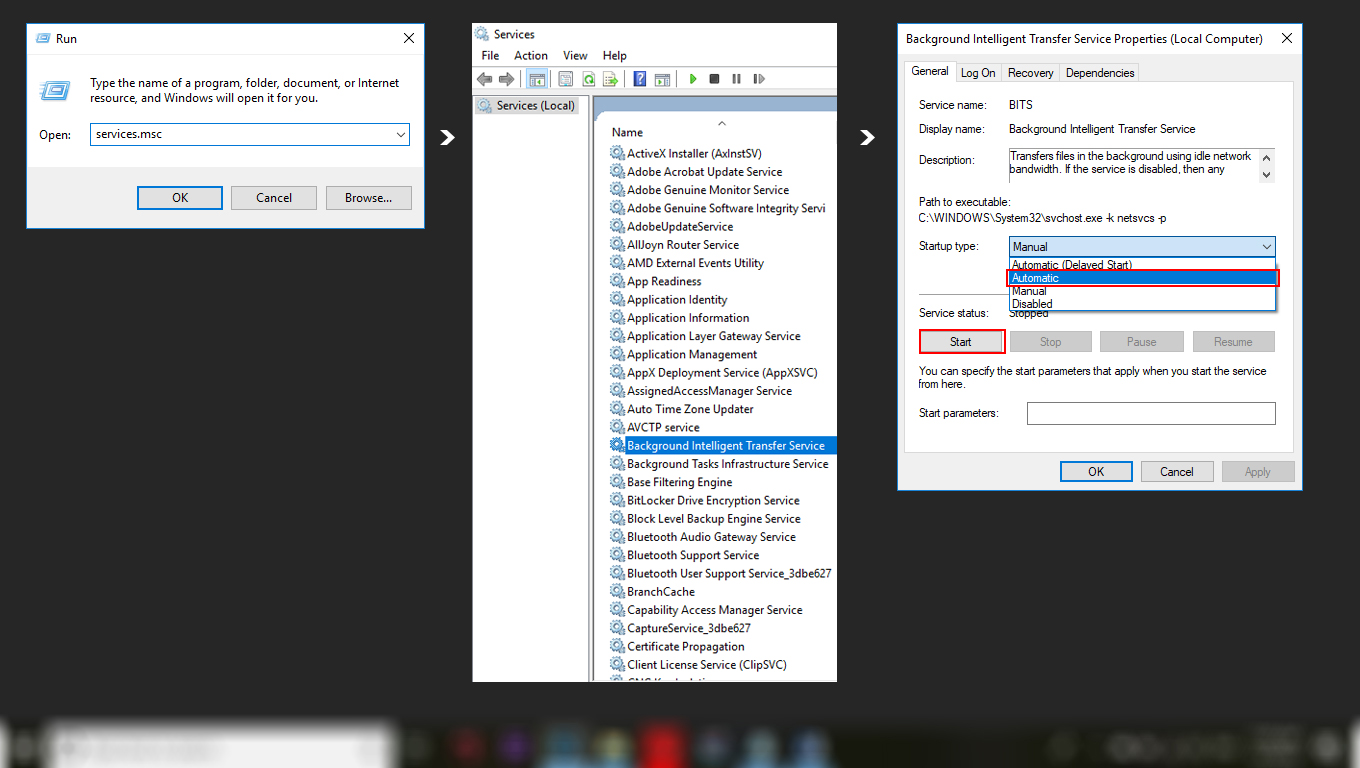
1) Press the Windows + R keys simultaneously to launch the Run box.
2) Type “services.msc” and press OK to launch the Services snap-in.
3) Double-click “Background Intelligent Transfer Service.”
4) Ensure that startup type is set to Automatic. Now, click the Start button. Then click OK to close the window.
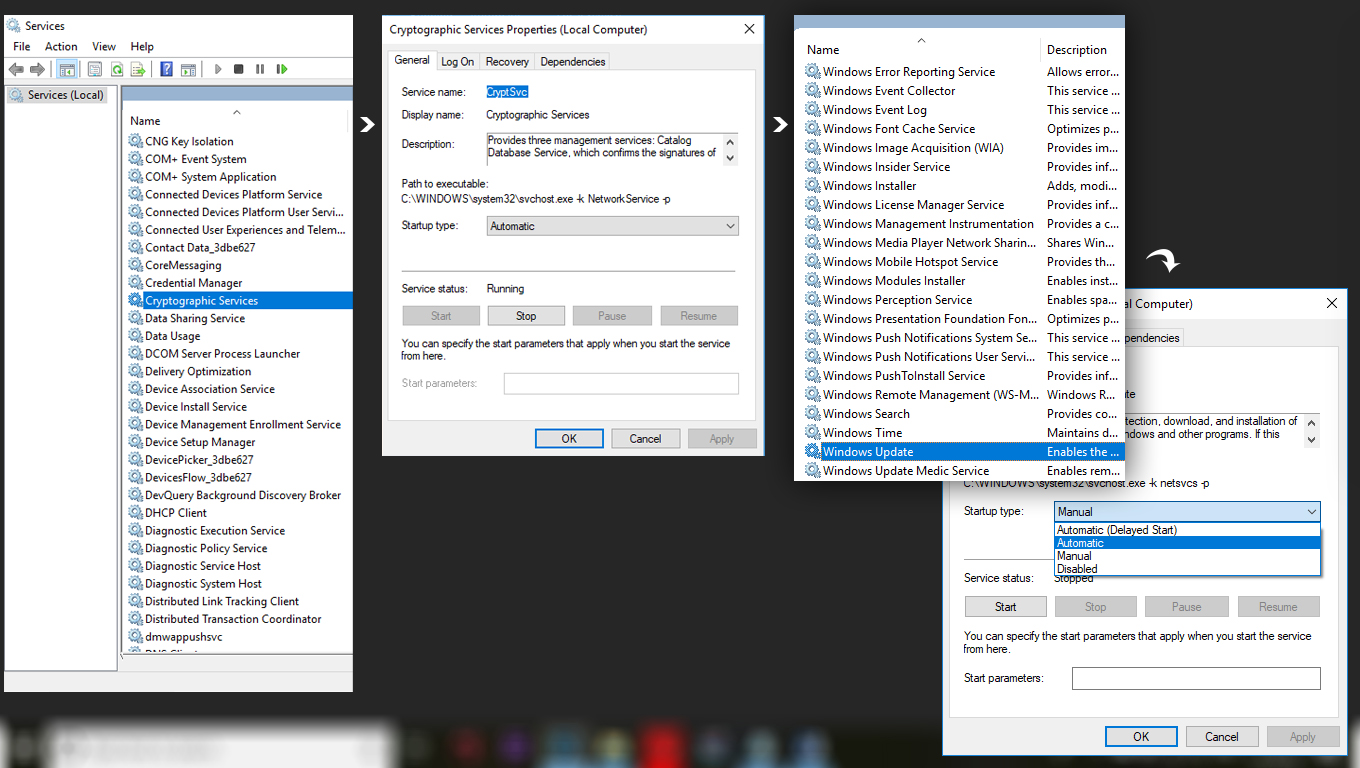
5) Double-click Cryptographic Services.
6) Ensure that startup type is set to Automatic. Now, click the Start button. Then click OK to close the window.
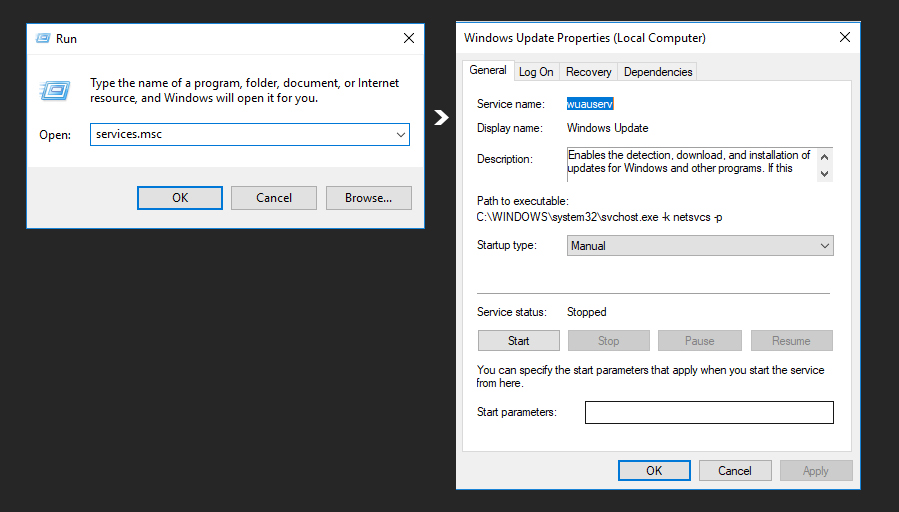
7) Double-click Windows Update.
8) Ensure that startup type is set to Automatic. Now, click the Start button. Then click OK to close the window.
9) Close the Services snap-in and restart your computer and see if the problem is fixed.
Method 4: Clear the SoftwareDistribution folder
Temporary files for Windows Update are stored in the Software Distribution folder. If these files get corrupted, this issue might show up. To check if these are the culprit, you need to remove all the content of this folder.
1) Press the Windows + R to launch the Run box.
2) Type “services.msc” and press OK to launch the Services snap-in.
3) Select Windows Update and then click Stop.
4) Open File Explorer (Windows key + E), then go to C:\Windows\SoftwareDistribution and delete all the files and folders there.
5) Restore the Services snap-in and click Windows Update, now click Start.
6) Restart your computer. The Windows Update Service should be running now.
 (0 votes, average: 0.00 out of 5)