Ethernet connections are easier to install and manage than wireless connections, sometimes they can be a little bit difficult to troubleshoot. The main advantage of a wired network would be stability, wireless connections can be affected by physical interference but its wired part is less prone to such connection issues. That is why cable connections are more recommended for servers, gaming and many other works.
The problem of Ethernet not working might be associated with a lot of things like, it can be a problematic wire, loose connection, network card, outdated driver and numerous other elements resulting in Ethernet problems. The problem can be triggered by both a hardware issue and a software application issue.
Ways to Fix Ethernet Not Working Problem
Method 1: Check if Ethernet is Enabled
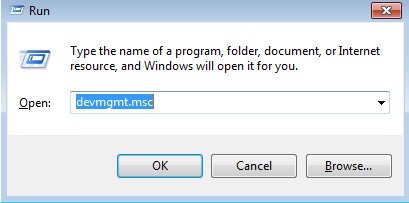
- Press Win+R to open Run dialog box.
- Type devmgmt.msc and click on OK button. The Device Manager window will pop up.
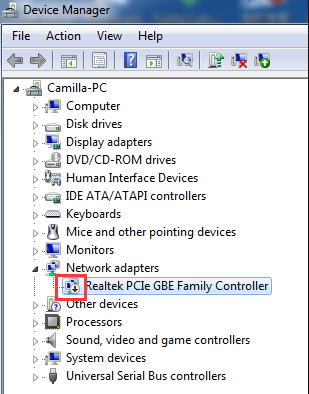
- In Device Manager, expand Network adapters
- Next to the Ethernet card device name, if you see a computer icon with an arrow on it, the Ethernet has been disabled.
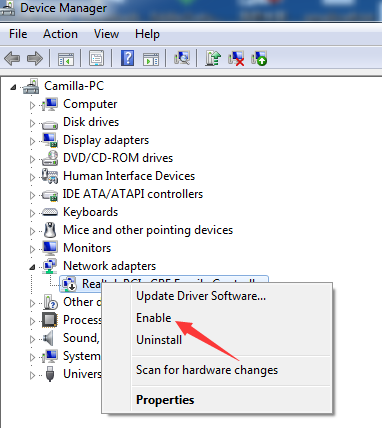
- Then right-click on the device name. Click Enable from the pop up menu.
Method 2: Check your Drivers
Check if the correct driver is installed for your Ethernet card.
- Open Device Manager as shown in Method 1.
- Expand the Network adapters list and check whether there are any issues with the devices.
- Right click on it and select Properties. In the Device status window it should say that your device is working properly.

- If your Ethernet controller icon has a question mark or an exclamation point than I’d recommend reinstalling the correct driver for it.
Method 3: Use Windows Troubleshooter
- Press Win + I to launch the Settings.
- Go to the Update & security menu.
- On the left side, select the Troubleshoot tab.
- Highlight the Internet Connections.
- Click the Run the troubleshooter.
Then Windows will automatically detect the problem and try to troubleshoot it.
Method 4: Reset Ethernet Adapter
- Launch the Settings.
- Go to the Network & Internet
- On the Status tab, scroll down for Network reset.
- Click the Reset now.
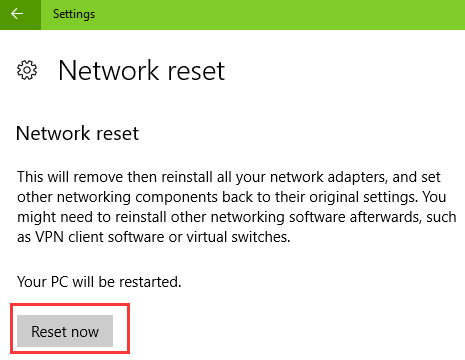
- Click Yes and restart the PC.
Method 5: Turn off Your Antivirus/Firewall
Some users confirmed that shutting off their firewall and VPN tools fixed the issue. So, if you still cannot use your Ethernet connection, temporarily disable your firewall program and VPN and test the connection. If it still does not work, try restarting your machine and test once again.
Method 6: Modify the Network Configuration
The IP conflicts can also result in the Ethernet connection problem
- Go to the Start menu.
- Under the W category, expand the Windows System.
- Right-click the Command Prompt and select Run as administrator.
- Type the command lines netsh winsock reset catalog and hit the Enter.
- Type the command netsh int ipv4 reset reset.log and hit the Enter.
- If the two command lines fail to work, then reset the IP address with the command ipconfig /renew.
ipconfig-renew-fix-ethernet-not-working-windows-10
Method 7: Unload Power
This is an old trick but it has worked for a lot of users.
- Turn off your system.
- Unplug the power cord. Remove the battery if you have a laptop.
- Hold the power button for 30 seconds and then release it.
- Now, plug in the system (or insert the battery if you have a laptop).
- Turn on your system.
Method 8: Roll Back the Network Adapter Driver
- Launch the Device Manager
- Go to Network adapters > select the network adapter.
- Right click the network adapter and go to Properties.
- In the Properties window select the Driver tab and go to Roll Back Driver.
- Follow the on-screen steps to install a previous driver version.
- If the button is unavailable, that means there’s no driver to roll back to.

 (52 votes, average: 4.76 out of 5)