
INET_E_RESOURCE_NOT_FOUND Error
INET_E_RESOURCE_NOT_FOUND occurs while using Microsoft Edge web browser in Windows 10. The error doesn’t allow users from accessing a specific website which were accessible before. However, it’s not a simple connectivity error. The reason of the error is one of the cumulative updates provided by Microsoft.
Windows 10 users started reporting about this problem on Microsoft forums after the release of Creators Update. It seems that cumulative update KB4022725 (OS Build 15063.413 and 15063.414) had a bug which broke Microsoft Edge. However, Microsoft engineers haven’t fixed this problem yet, and users continue having these connectivity problems.
After the installation of this update, Microsoft Edge users’ browsing sessions are disturbed by an error message saying:
“The DNS server might be having problems. Error Code: INET_E_RESOURCE_NOT_FOUND.”
Methods to fix INET_E_RESOURCE_NOT_FOUND
Method 1: Disable TCP Fast Open Feature on Edge
1. Launch Microsoft Edge and type about:flags in the URL address bar.
2. Scroll down to find Network section.
3. Locate TCP Fast Open and uncheck the box next to it.
4.Restart Edge.
Method 2: Uninstall Wi-fi Driver
You need to enter Safe Mode if you can’t start Windows normally. Follow the instructions below depeding on your case.
If you can boot Windows successfully, follow these steps to uninstall the drivers.
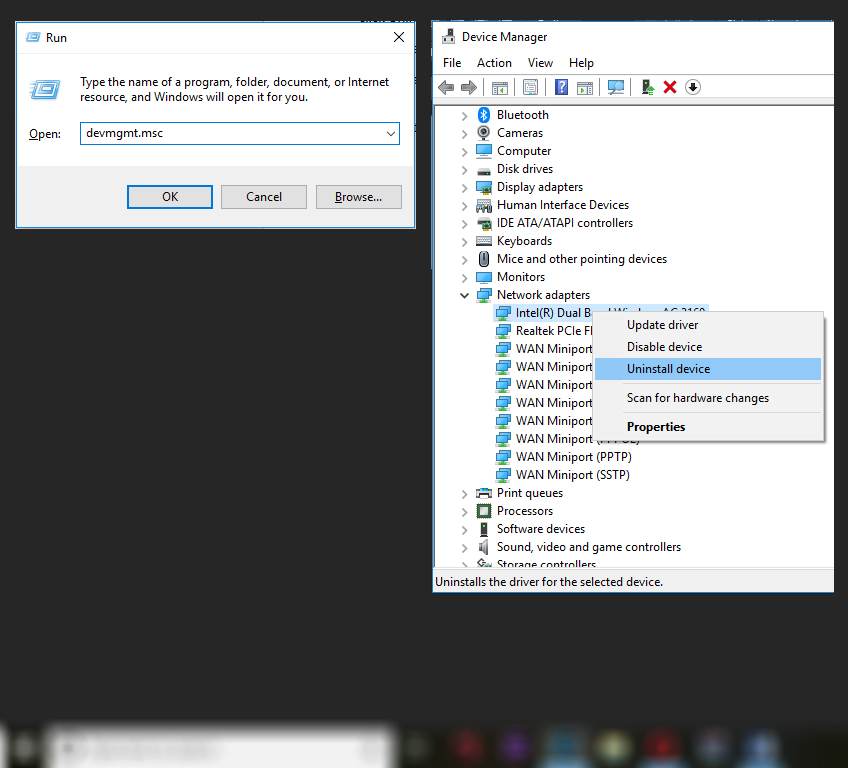
1) Press the Windows + R keys to open the run command.
2) Type devmgmt.msc and click OK. Then Device Manager Window will open.
3) In Device Manager, expand category “Network adapters”. Right-click on a network device and click Uninstall.
4) You may be asked to confirm the uninstall. Click OK to confirm it.
5) If you also have installed wireless network adapters, repeat steps above to uninstall and the wireless drivers.
6) Reboot your pc and check to see if the problem is resolved.
Method 3: Reinstall Microsoft Edge
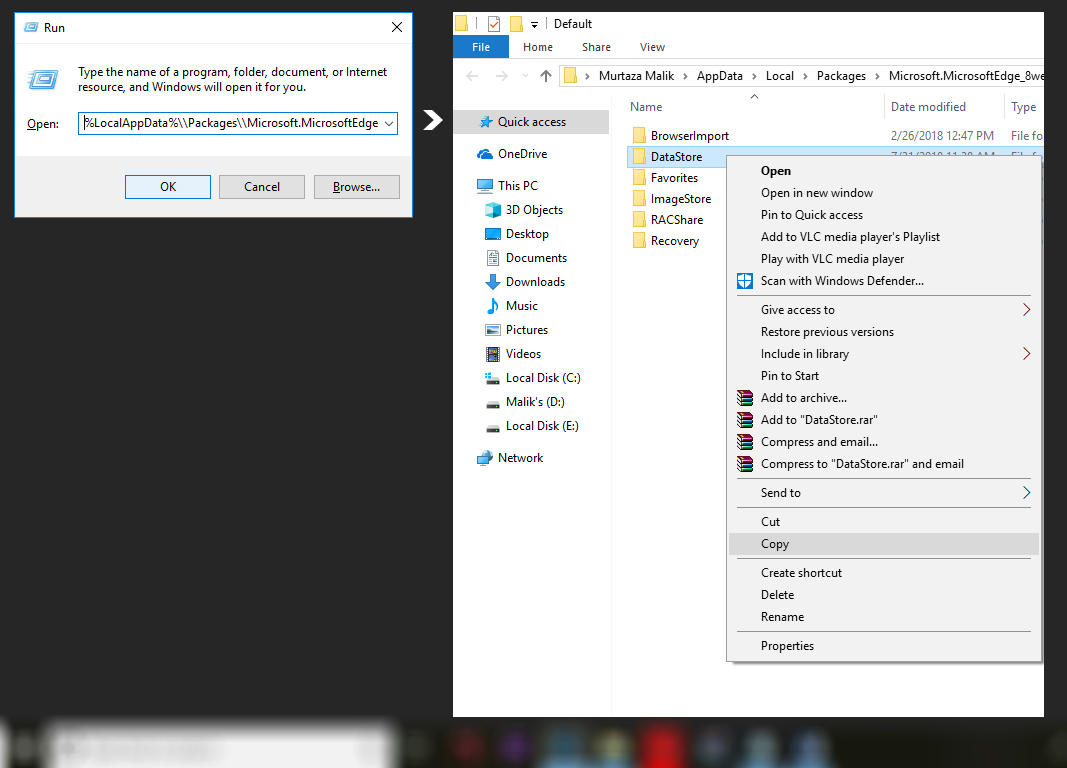
1. Press Windows key + R, type %LocalAppData%\\Packages\\Microsoft.MicrosoftEdge_8wekyb3d8bbwe\\AC\\MicrosoftEdge\\User\\Default, and press Enter;
2. Right-click on the DataStore folder and select Copy;
3. Open the Desktop, right-click on an empty space, and select Paste. These steps explain how to create backups of your favorites. Once done, perform the following steps to reinstall Edge;
4. Close Edge and open File Explorer;
5. Click View and mark the Hidden items box;
6. Then navigate to the C:\\Users\\UserName\\AppData\\Local\\Packages directory (Replace “UserName” with your user name);
7. Find Microsoft.MicrosoftEdge_8wekyb3d8bbwefolder and remove it;
8. Press Yeson the confirmation window to proceed;
9. Be patient and wait while the process is being executed. If a dialog box opens, click Yes to continue;
10. If the system refused to delete some of the files, click Skip button;
11. Once done, reboot your PC;
12. After that, press Windows key and type Powershell;
13. Right-click on the search result and select Run as Administrator;
14. Navigate to the cd C:\\users\\yourusername (Replace “UserName” with your user name);
15. Copy and paste the Get-AppXPackage -AllUsers -Name Microsoft.MicrosoftEdge | Foreach {Add-AppxPackage -DisableDevelopmentMode -Register “$($_.InstallLocation)\\AppXManifest.xml” -Verbose}command;
16. Once done, close Powershell and reboot.

 (54 votes, average: 4.74 out of 5)