Like many other Windows issues, there is no single solution for this issue. However, you can try different methods one by one to rule out some common causes of mouse pointer lag in Windows 10.
Since the Windows 10 was released and users upgraded their systems for the same, a lot of users reported that their mouse pointer is lagging after the update. As this is not the case with all the Windows 10 users, it’s quite definite that the problem is caused by either hardware or software that is interfering with the mouse.
There are different methods to solve this issue. So have a look at the following methods to check which one works for you.
Methods to solve Mouse Lagging issues in Windows 10
Before we begin, try your mouse on another computer to see if the lagging or freezing problem continues. If your mouse works well on the other computer, your mouse or the mouse driver could be at fault. To fix it, try these methods.
Method 1: Update your Graphic’s Driver
Yes, you heard it right. Although it seems like how Updating the Graphic’s Driver troubleshoot the mouse lagging issue, this is one of the few ways out to get rid of the problem because when you upgrade your Windows, one of the major issues is driver compatibility. Check your graphics card manufacturer if they have released an updated driver for Windows 10 (they usually have). If it has released, install the latest drivers for your graphics card by all means.
Check your mouse after installing the latest drivers.
Note: If your mouse is still lagging, change resolution and refresh rate in the graphics card utility provided by your graphics card manufacturer instead of the standard Windows 10 Settings.
If none of these methods works move to the next solution.
Method 2: Reinstall the mouse driver
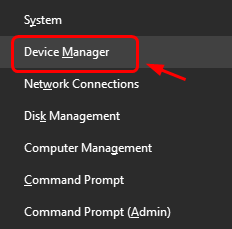
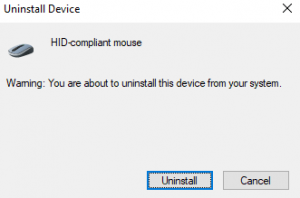
- Press the Windows + Xkeys at the same time. Select Device Manager.

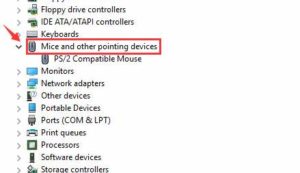
- Press Tab, locate Mouse and other pointing device and expand it.
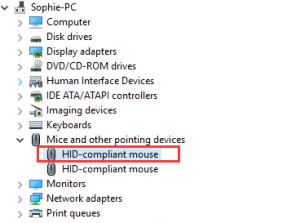
- Find your mouse name, then press Enter.
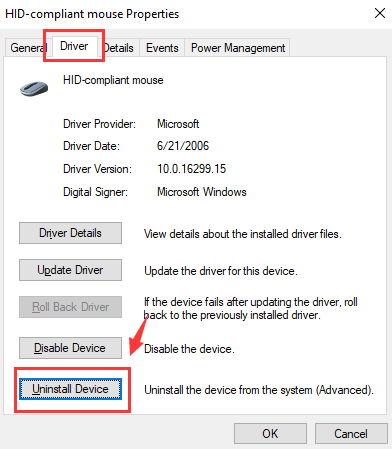
- Press the Tab and Ctrl key simultaneously until you are at the Driver tab. Press Tab and select Uninstall Device.
- If you’re prompted to restart your computer, press Enter. If not, press Tab to restart your computer later.
- If you choose not to restart your computer right after the uninstall, go to the toolbar in Device Manager and click Scan for hardware changes.
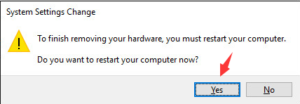
If the mouse is currently not working, you can press F5 on your keyboard and the scan will start.
Windows will help you reinstall the drivers for your mouse. After that, see if your mouse lagging problem is fixed now.
Method 3: Check Realtek Card Settings (If Applicable)
Your Realtek audio driver might be messing up with your mouse drivers, so you need to disable it. To disable automatic startup of this program, follow these steps.
- Right-click on an empty area on your taskbar and click Task Manager.
- Find and click on exe, right-click on it and choose End Task.
- If this solves the issue, click Disable button at the bottom right corner of the Task Manager window to stop automatic start of this program.
Method 4: Check Local Area Network Settings
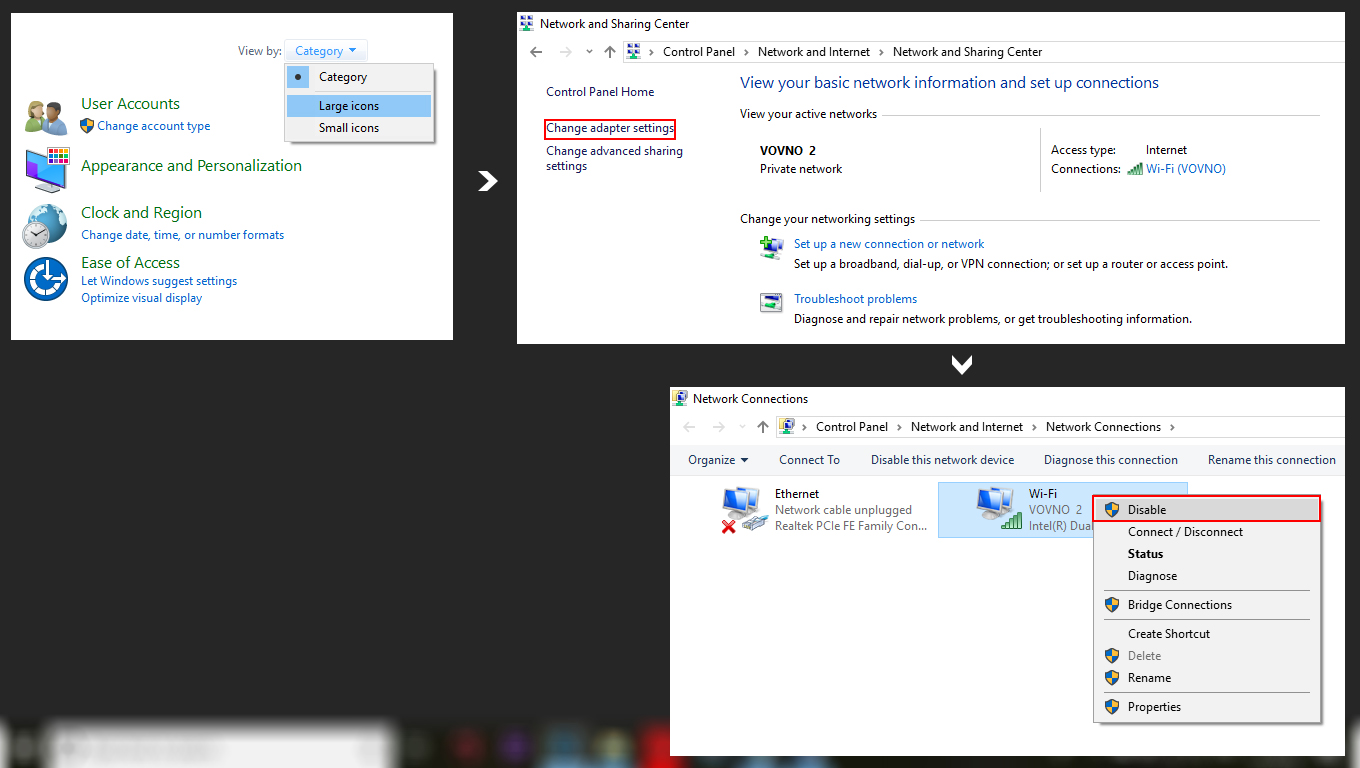
- Right-click on the Start button and choose Control Panel.
- Click on View by drop-down menu and choose Large icons or Small icons.
- Click on Network and Sharing Center.
- Click Change adapter settings in the left pane.
- Network Connections window will appear. Right-click on the name of your LAN card and choose Disable.
- In the same Network Connections window, right-click on the name of your Wi-Fi card and choose Enable.

 (51 votes, average: 4.82 out of 5)