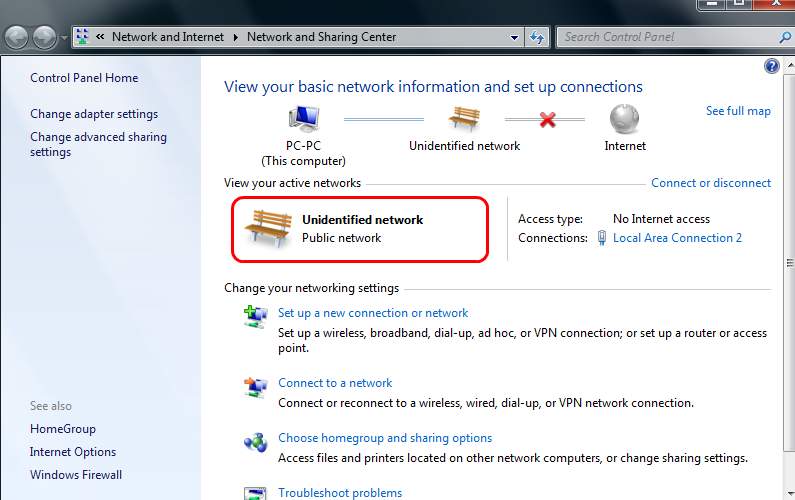
A lot of Windows users are unable to connect to the router and see Unidentified network, with the No Internet access in the network connection window. In such case the network connection icon in the notification area shows a yellow exclamation mark. You can try the following methods to resolve this Unidentified Network Issue.
Restart Router/Modem
Network setup can often trigger this and other errors to appear, and the simplest method to fix this issue is to reboot your modem. If you have a wireless router, you should reboot it as well.
Turn-off Airplane Mode
- Press Windows + A to open Action Center.
- If the Airplane mode is ON, change it to OFF.
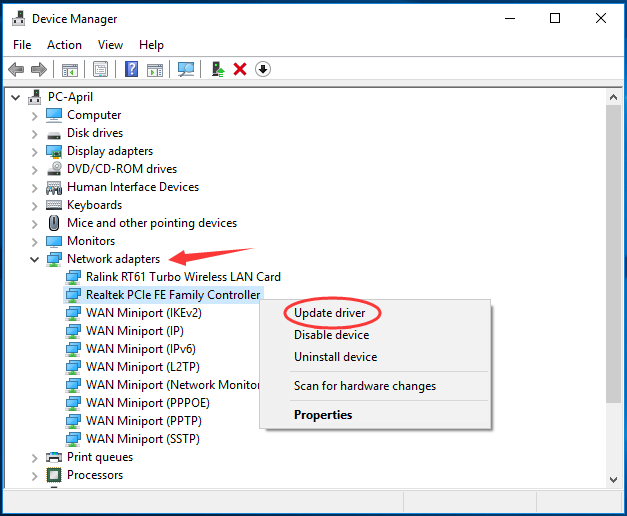
Update Network Adapter Driver
- Press Win + X and select Device Manager.
- In Device Manager window expand Network Adapter, then right-click on your network adapter driver software currently used to choose Update driver.
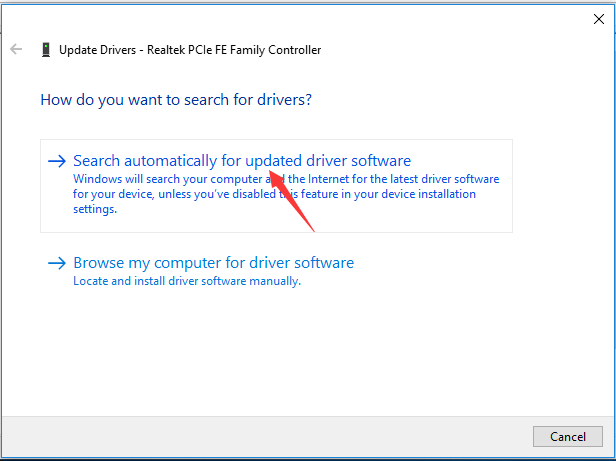
- Click Search automatically for updated driver software.
- Just keep on to follow the on-screen instructions to complete updating if there’s one detected.
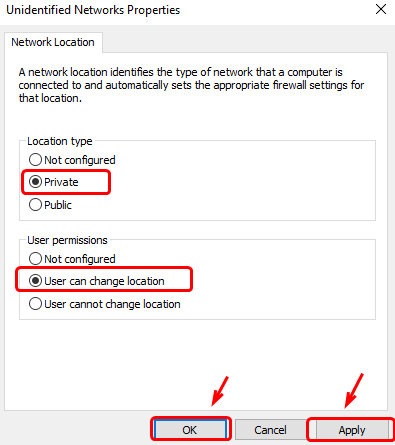
Set Unidentified Network as a Private or Public
- Press the Windows key and then type secpol.msc and click secpol.msc.
- Click Network List Manager Policies. On the right side, double-click Unidentified Networks.
- Change the Location type to Private and the User permissions to User can change location. Then click Apply and OK.
Disable Conflict Network Connection Items
- Right click the network icon in the notification area to select Open Network and Sharing Center.
- Click on Change Adapter Settings.
- Right click the Ethernet or Local Area Connection and select Properties.
- Choose the Network
- Uninstall the conflict items on the list.
Change TCP/IP DNS Server Address
- Type network in the search box and then go to Network status.
- Select Change adapter options.
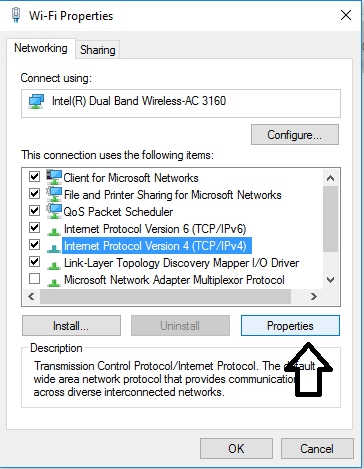
- Locate for your Network Connection provider in Local Area Connection or Wireless Connection and select Properties by right-clicking on the icon.
- In the newly opened window, opt for the Internet Protocol (4 TCP/IPv4) and click Properties.
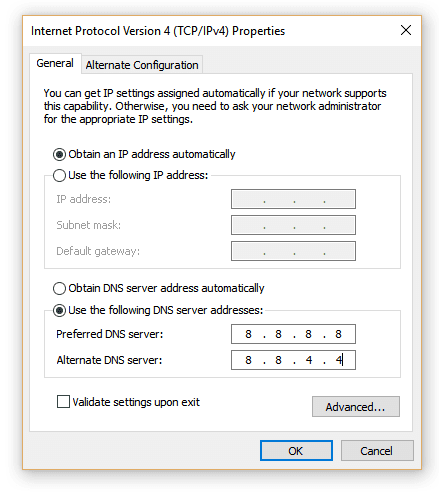
- Select the Use the following DNS server address instead
- Now enter the following server addresses and click OK afterwards:
Preferred DNS server: 8.8.8.8
Alternate DNS server: 8.8.4.4
Disable Windows Firewall
- Press Win + X and select Control Panel.
- Type Windows Firewall in the search bar located in the top right corner and click Windows firewall.
- Click on Turn Windows firewall on or off.
- Click Turn off Windows firewall (not recommended) in both private and public network settings.
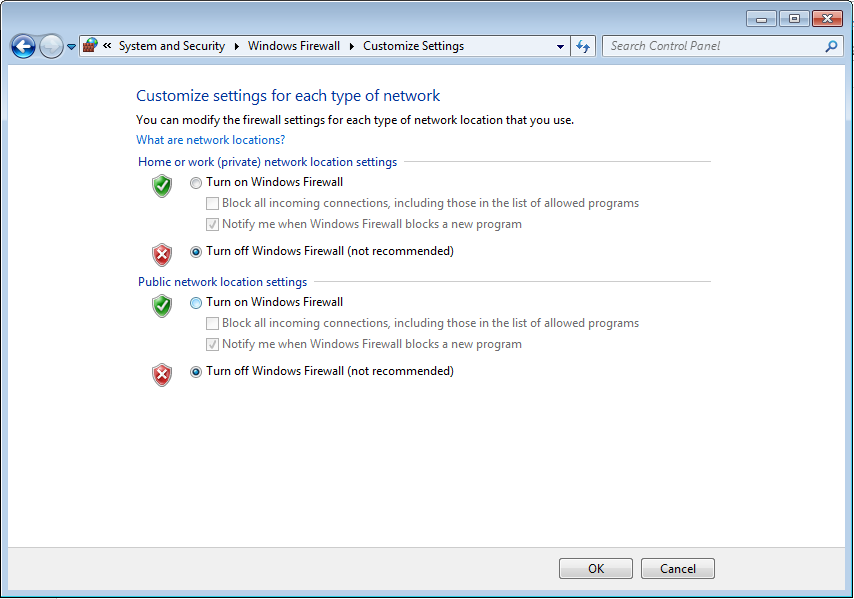
- Click OK.
Use Network Troubleshooting Commands
- Go to Start Menu and type cmd in the search box.
- Open Command prompt with Administrative Rights.
- Type the following commands and hit Enter after each one:
netsh winsock reset
netsh int ip reset
ipconfig /release
ipconfig /renew
ipconfig /flushdns
- Reboot to apply changes.
Change the Ethernet cable
There might be fault in your Ethernet cable, try changing it in order to resolve the problem. Or, you can also try connecting to a Wi-Fi network.
Refresh Network Settings
- Press the Windows key and type cmd in the search box. Right-click Command Prompt and click Run as administrator.
- Type in the following commands press the Enter key after each command.
ipconfig /release
ipconfig /renew
netsh winsock reset
netsh int ip reset
ipconfig /flushdns
ipconfig /registerdns
netsh int tcp set heuristics disabled
netsh int tcp set global autotuninglevel=disabled
netsh int tcp set global rss=enabled
netsh int tcp show global
 (0 votes, average: 0.00 out of 5)