
Windows 10 Automatic Repair Loop
Just when you thought, Windows Automatic Repair will help you out with the boot error but the only thing it brought were more errors. The worse part of the automatic repair is that it seems like it’s never going to end. To end this issue have a look at the solutions.
Since the Windows keeps restarting, it is impossible for you to access Advanced Options, that you can fix the problem there. In this case, you can boot from a USB or DVD.
Methods to fix Automatic Repair Loop
- First start your PC from the USB or DVD and open Command PromptFor bootable USB:
Plug the USB in the defective computer. As soon as you start the computer, enter boot menu by pressing function key which is F2 or F12 generally. The key to enter boot menu differs from computer to computer. You can go to the PC manufacturer’s website to check it.For bootable DVD:
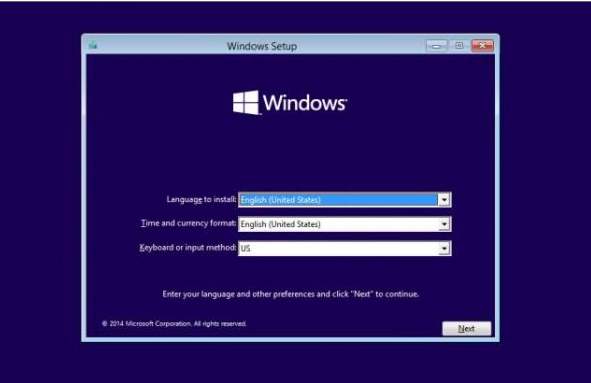
Insert the DVD in the computer. Wait for the message “Press any key to boot from CD or DVD”. Press any key to continue. If you don’t see this message, you probably have to change the boot order in the BIOS (Basic Input/Output System). - When you go to the setup screen, select the Language that you wish to use.

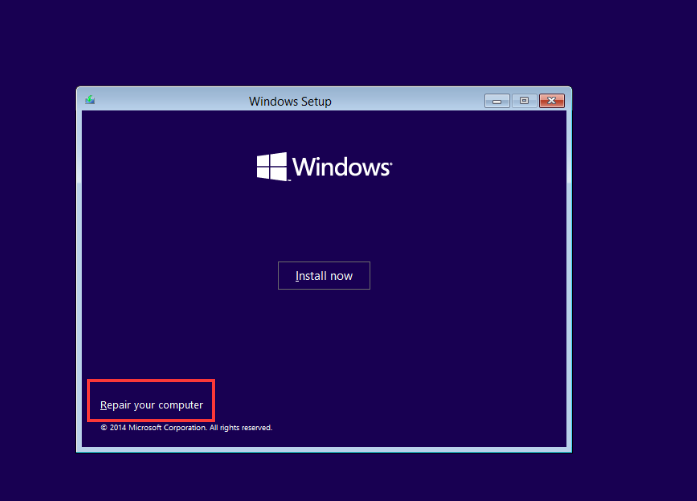
- Then you will see the Windows Install screen, select Repair your computer at the bottom left corner.
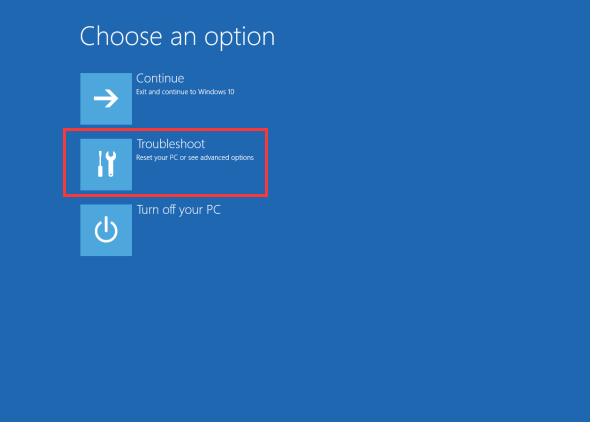
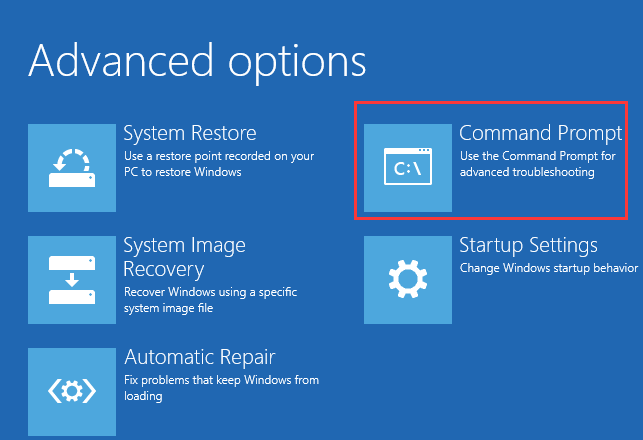
- In Choose an option screen, select Troubleshoot.
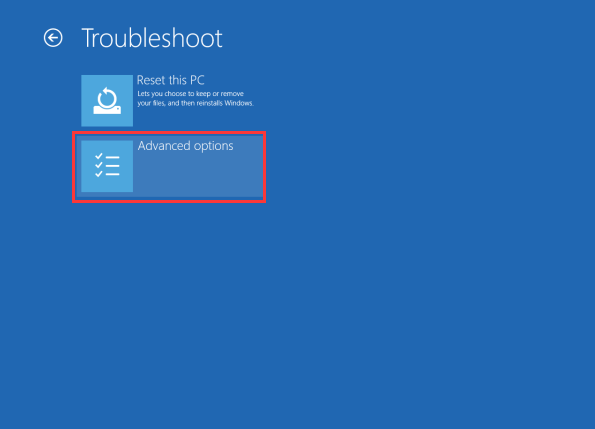
- Then select Advanced options.
- In Advanced Options screen, select Command Prompt. Then a new screen will be displayed with and open command prompt. If you are prompted to enter password, enter your Windows password.
Solution 1: Disable Automatic Startup Repair
1. In Command Prompt, type bcdedit and hit Enter. Then you will see the result displayed. Look for resumeobject item and note the number next to it (In below case, the number is 7ce0dd34-d277-11e4-8263-68f7286346fb).
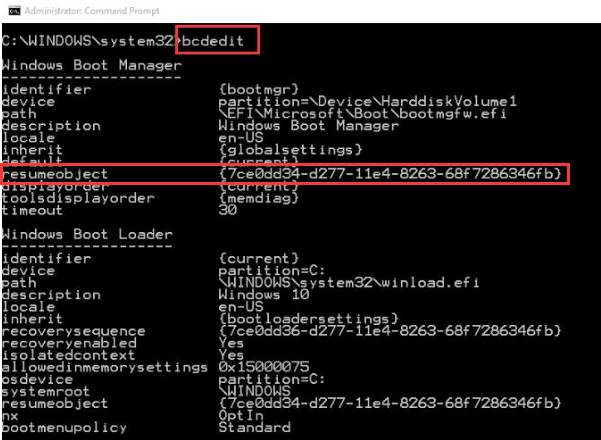
2. Type bcdedit /set GUID recoveryenabled Noand hit Enter. Replace GUID with the number that you noted in last step. (For example, if the number is 7ce0dd34-d277-11e4-8263-68f7286346fb, the full command will be “bcdedit /set 7ce0dd34-d277-11e4-8263-68f7286346fb recoveryenabled No”)
3. Reboot your PC and Windows should start without no problem.
Solution 2: Restore Windows Registry
1. In Command Prompt, type copy c:\windows\system32\config\RegBack\* c:\windows\system32\config and hit Enter.
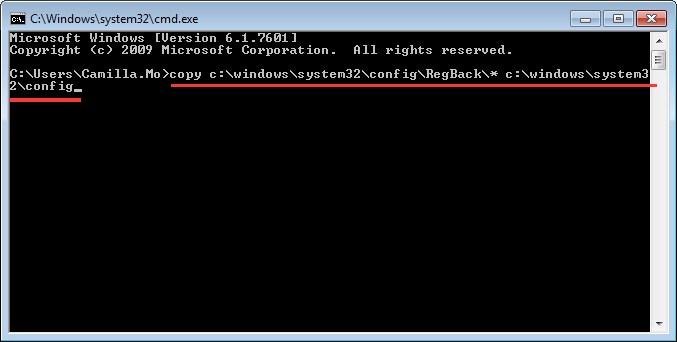
2. If prompted to overwrite existing files, type All and hit Enter.
3. Type exit and hit Enterto close the Command Prompt window.
4. Restart your computer.
Solution 3: Remove Your RAM
Simply removing the RAM can fix the loop error. You can try this solution. If you have more than one RAM, remove one at a time then start your PC without it. This will just make it clear which RAM is creating problems. You might need to do this a few times until you test every RAM module.
After entering Windows, run a disk check to check if there is any problem with the disk and run a system file check to check if some system files are corrupted. If neither of them work, try to restore Windows registry.
Run a disk check
Follow steps below:
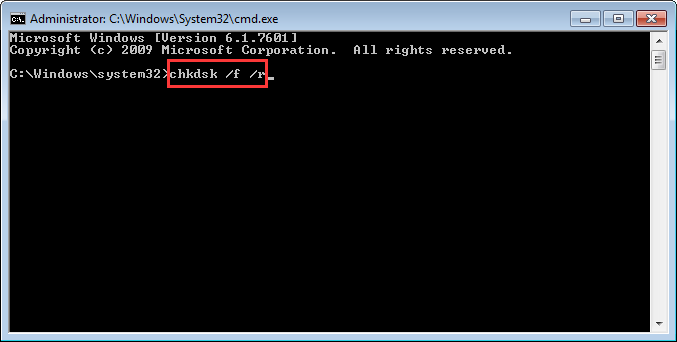
1. Open Command Prompt as an administrator.
2. Type chkdsk /f /r and hit Enter. You need to wait a while until the process completes.
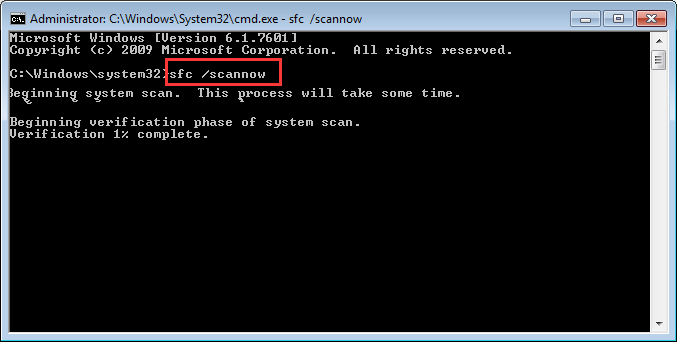
Run a system file check
Follow steps below:
1. Open Command Prompt as an administrator.
2. Type or paste sfc /scannow and hit Enter. The process will also take some time to complete.

 (54 votes, average: 4.52 out of 5)