Many Windows 10 users reported that their computer freezes randomly. This Windows 10 freezes problem started after Microsoft released the Fall Creators Update. Windows 10 freezes problem can occur at any time while login, after Windows update, on start-up and so on.
Microsoft launched an update to fix Windows 10 freezes problem. If you are experiencing Windows 10 freezes issue you should start fixing it by installing the KB3176938 update. If installing the update didn’t help you, try the methods given below to resolve Windows 10 freezes problem.
Update Driver
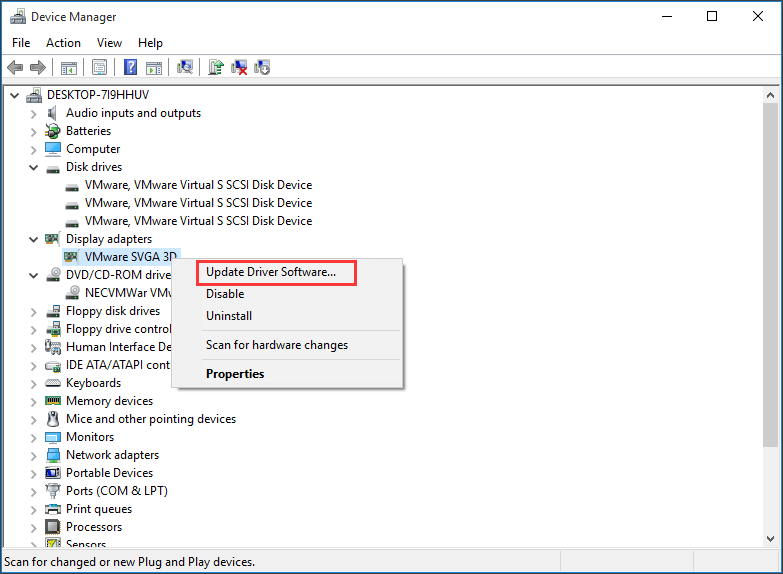
- Press Windows + X and select Device manager.
- In the Device manager window expand Display adapters.
- Right click on the driver you wish to update and select Update Driver.
- Select Search automatically for update driver software.
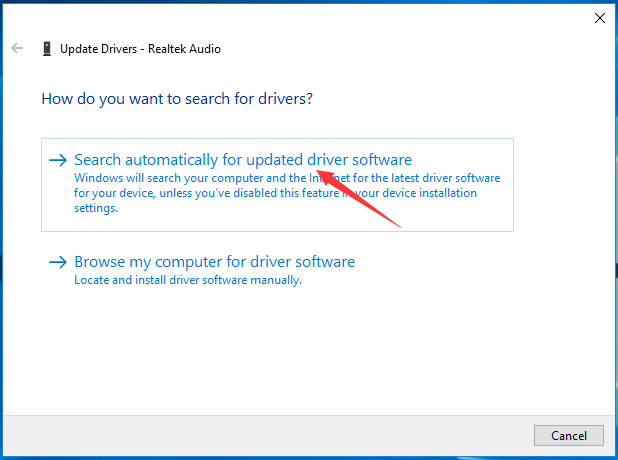
- Windows will automatically install the updates, if there is any.
- After installing the updates see if Windows 10 freezes.
Roll Back to Previous Version
- Press Windows + I to open Settings.
- Click on Update & Security.
- Select Recovery from the left pane.
- Under Go back to the previous version of Windows 10, click Get Started.
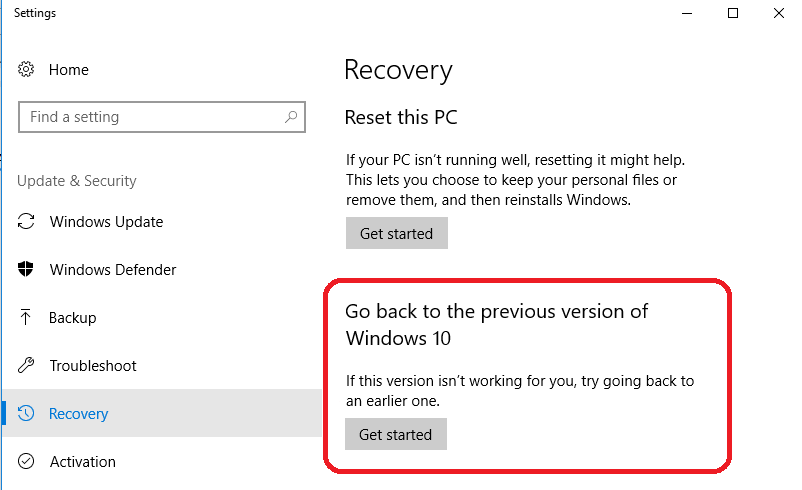
- Follow the on-screen instructions to complete the process.
Note: You will not see the option to Go back to the previous version of Windows 10, if it has been more than days since the last update.
Clean-up Temp Files
- Press Windows + R to open Run dialog box.
- Type temp and press Enter.
- Select all the temp files in the folder and delete.
Run a Memory Check
- Press Windows + R to open Run dialog box.
- Type exe and press Enter.
- Select Restart now and check for problems(recommended). If you want to check later, you can also select Check for problems the next time I start my computer.
- Windows will now restart.
Adjust Virtual Memory
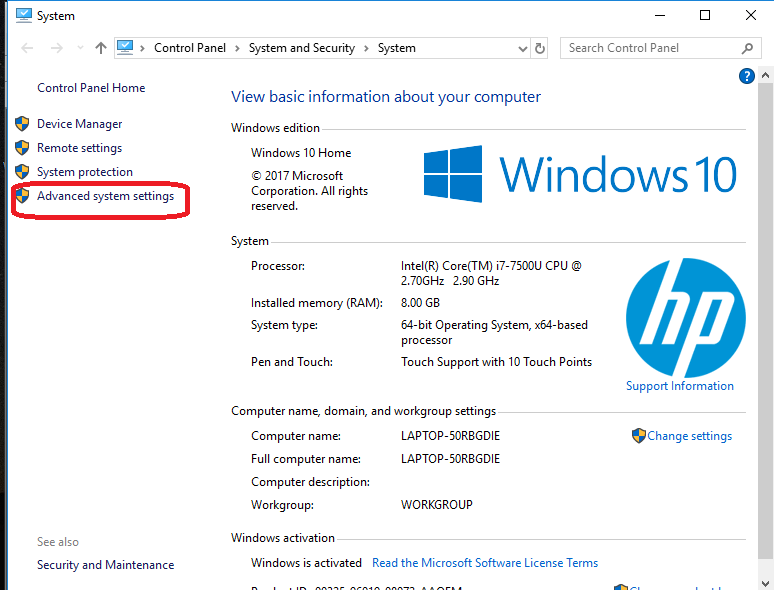
- Type control in the search box and select Control Panel.
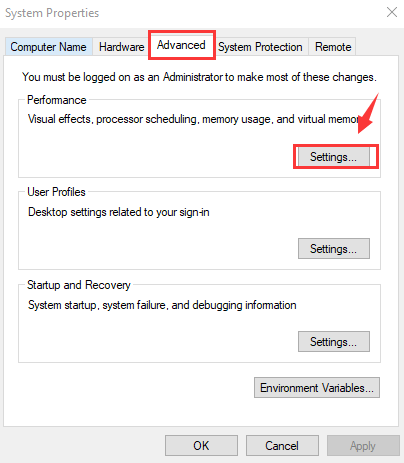
- Select Advanced system settings from the left pane.
- Go to Advanced tab and click on Settings.
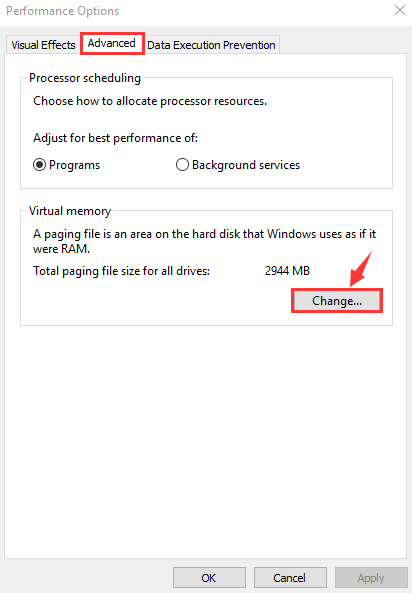
- Again go to Advanced tab and select Change… under Virtual memory section.
- Uncheck Automatically manage paging file size for all drives.
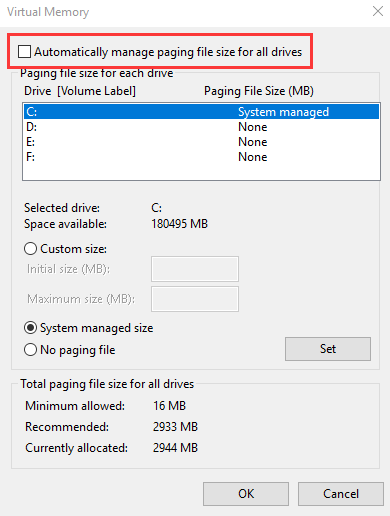
- Select the partition that has Windows installed (usually, it is C:) and enter an Initial size and Maximum size for your virtual memory.
- After Configuring your virtual memory values, click on Set and after that OK.
Run System File Checker
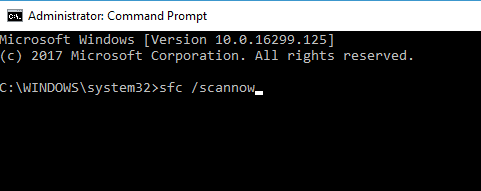
- Type cmd in the search box and select Command Prompt, right click on it and select Run as administrator.
- Type sfc /scannow and press Enter.
- Wait for the scan to complete.
Run Disk Check
- Type cmd in the search box and select Command Prompt, right click on it and select Run as administrator.
- Type chkdsk/f/r and press Enter.
- Type “Y” in response to the resultant notification.
- Restart your computer.
Disable or Uninstall Antivirus
Disabling your Anti-virus you can ensure it will not conflict with any of the windows update service or Windows firewall program.
Uninstall any third party antivirus you have on your system.
Turn-Off Fast Startup
- Press Windows + X to open the WinX
- Click on Power Options.
- Click on Choose what the power buttons do.
- Select Change settings that are currently unavailable.
- Uncheck the option Turn on Fast Startup (recommended), to disable it.
- Click on Save changes.
 (0 votes, average: 0.00 out of 5)