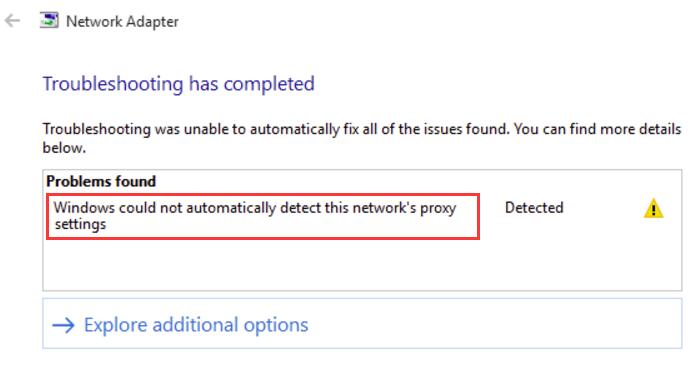
Many users are facing “Windows could not automatically detect network’s proxy settings” message and it can show up different messages and these are as follows:
Windows 10 can’t detect proxy settings
Windows could not automatically detect proxy server
Windows won’t save proxy settings
Windows proxy settings keep changing
Windows 10 proxy settings not saving, changing
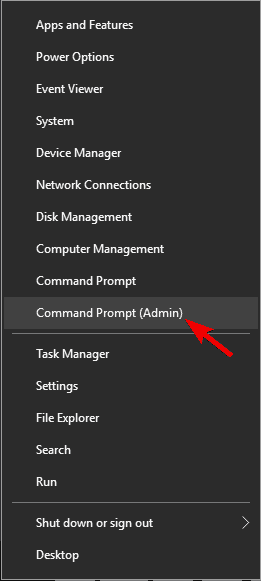
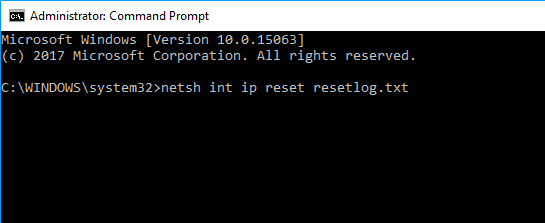
Solution 1: Reset TCP/IP
- Press Windows Key + X and select Command Prompt(Admin) from the menu.

- When Command Prompt starts, type netsh int ip reset resetlog.txt.
- Restart your computer and see if the issue is resolved.
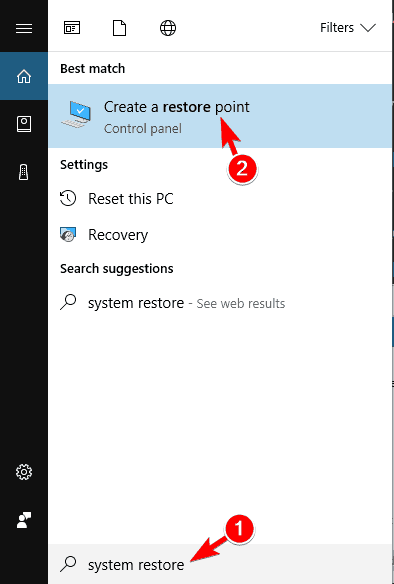
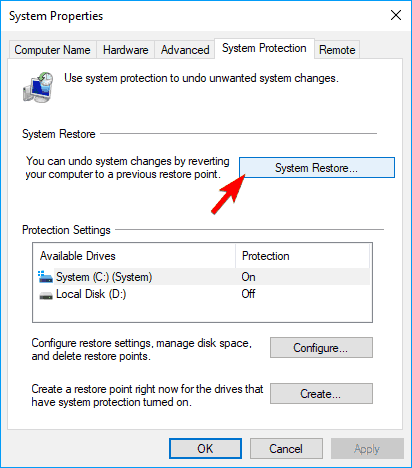
Solution 2: Use System Restore
- Press Windows Key + Sand enter system restore. Select Create a restore point from the list of results.
- As soon as the System Properties window appears. Click on System Restore button.
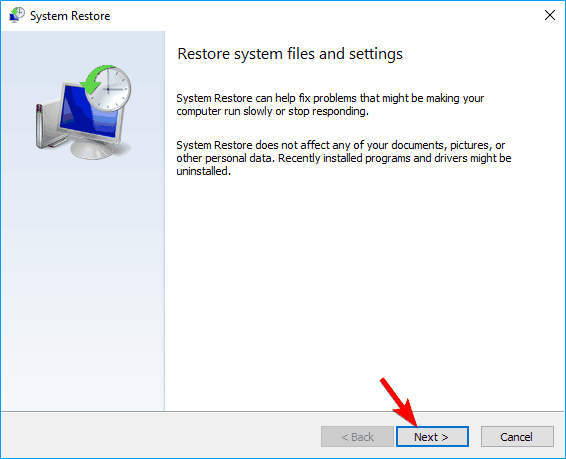
- When System Restore window appears, click on Next.
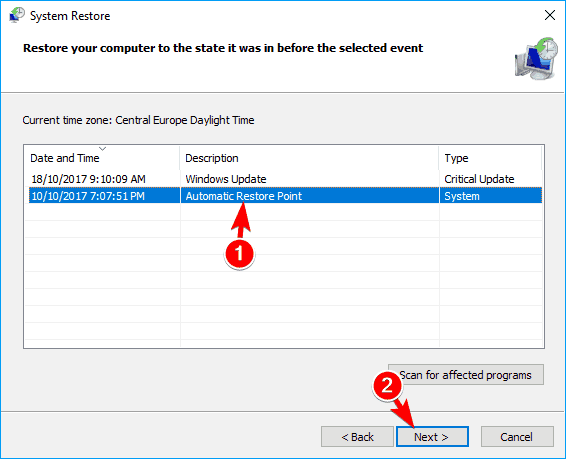
- Now you should see a list of recent restore points. If available, check Show additional restore points option. Select the desired restore point and click on Next.
- Follow the instructions on the screen to complete the restoration process.
After completing the restoration, the error message should be resolved and everything will start working again. Many users reported that this solution fixed the problem for them, so be sure to try it out.
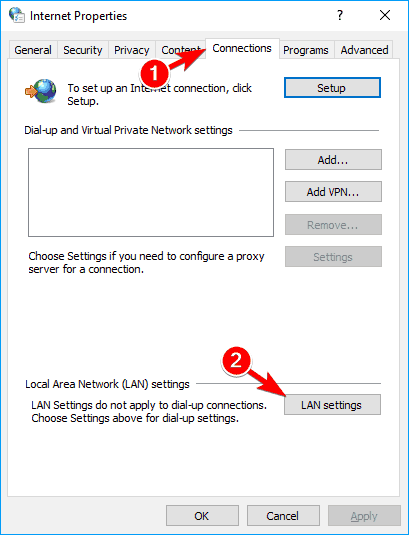
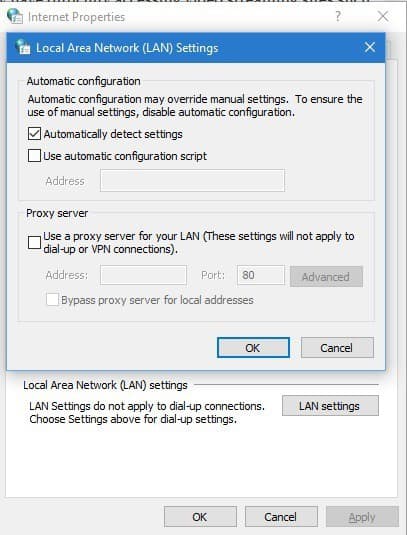
Method 3: Check your proxy server settings
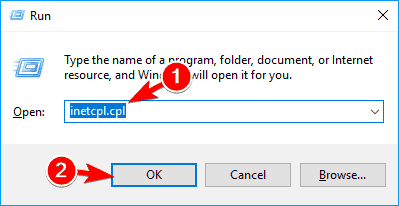
Disable proxy server on Internet Explorer.
- Press Windows Key+ R on the keyboard.
- When the Run dialog box appears type inetcpl.cpl and hit Enter.
- In the Connections tab, click the LAN settings button.
- Check if your proxy settings are okay.
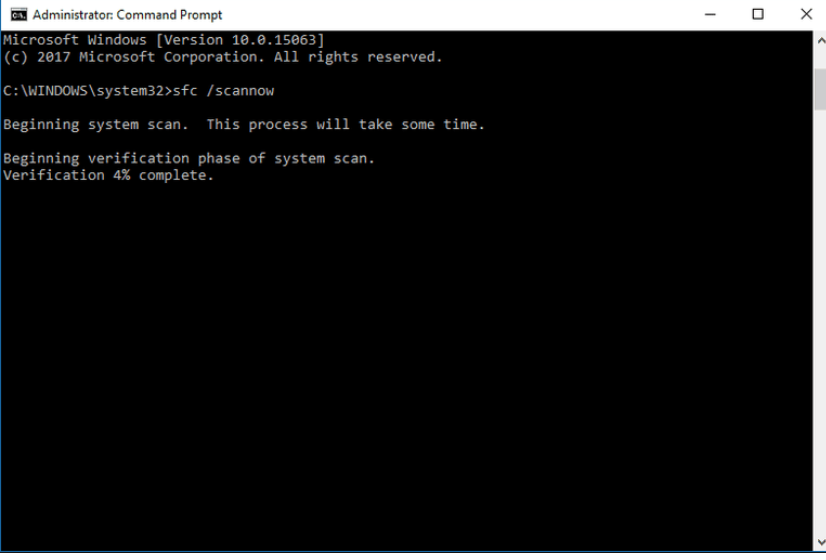
Method 4: SFC Scan
- Open the command prompt with administrator privilege.
- Open Start Menu and right click on Command Prompt -> Select Run as administrator.
- After opening the command line, type sfc/scannow
4. This command will take few minutes to scan your PC.
5. Once the execution gets completed, close the command prompt.
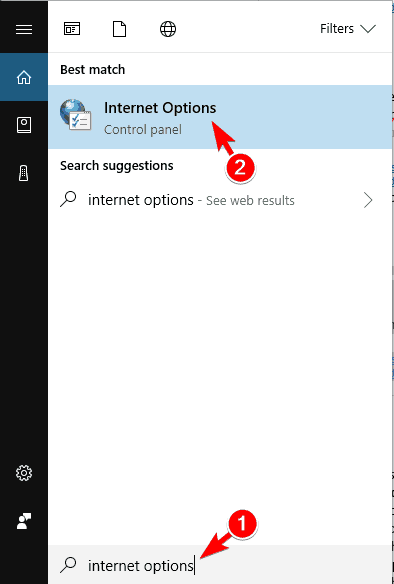
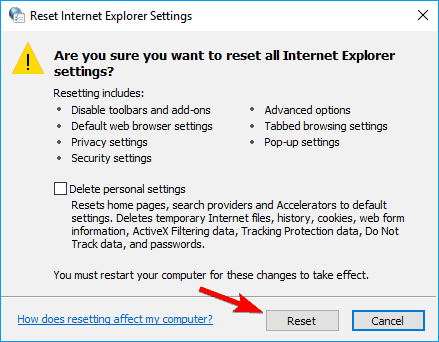
Method 5: Reset your Internet settings
- Press Windows Key + S and enter internet options. Select Internet Options from the menu.
- Navigate to Advanced tab and click on Reset.
- Click the Reset button. If you want, you can clear your personal data by checking Delete personal settings.
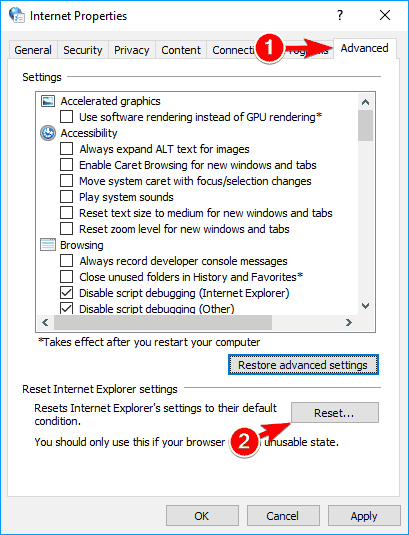
Optional: Click on Restore advanced settings.
- Now click on Apply and OK to save changes.
After resetting your Internet settings the issue should be resolved.
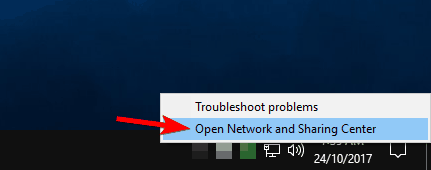
Method 6: Restart your network adapter
One of the simplest ways to fix “Windows Could not Automatically Detect Network’s Proxy Settings” error is to restart your network adapter. To do that, follow these steps:
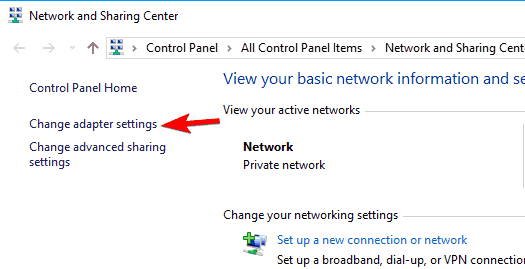
- Right-click the network icon in the bottom right corner and choose Open Network and Sharing Center.
- Click on Change adapter settings from the menu on the left.
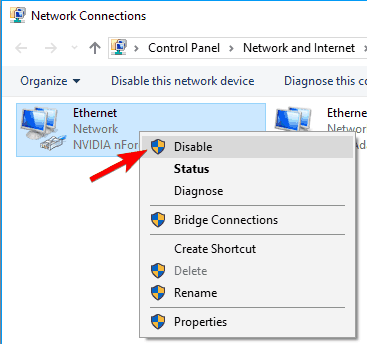
- Locate your network connection, right click it and choose Disable.
- Now right click your network connection again and choose Enable from the menu.
After restarting your network adapter the issue should be resolved and your network connection will start working again. Keep in mind that this might not be a permanent solution, so you’ll have to repeat it if the problem reappears.
Method 7: Enable Obtain DNS server address automatically
According to users, you might be able to fix Windows Could not Automatically Detect Network’s Proxy Settings error just by obtaining your DNS automatically. Many users prefer setting their DNS manually, but sometimes it’s better to use automatic settings. To do that, follow these steps:
- Open Network and Sharing Center and go to Change adapter settings.
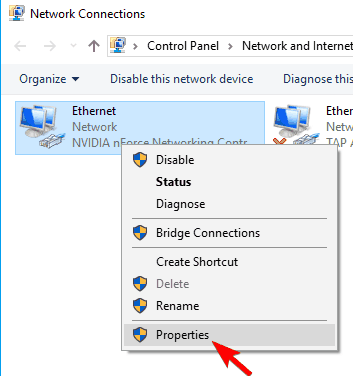
- Locate your network connection, right click it and choose Properties from the menu.
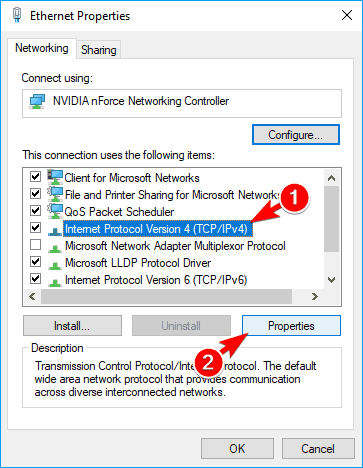
- Select Internet Protocol Version 4 (TCP/IPv4) and click on Properties button.
- Select Obtain DNS server address automatically and click on OK to save changes.
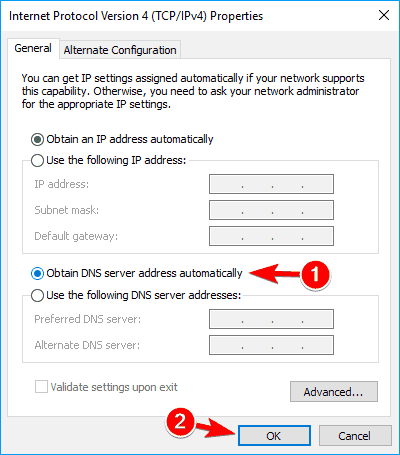
After doing that, the issue should be resolved and you’ll be able to access the Internet without any problems.
 (0 votes, average: 0.00 out of 5)