Error 0x80246007 appears when scanning for new Windows updates. This specific error code appears interchangeably with a variety of Windows Update errors. Generally, this error avoids updates for apps from being installed, lately some Windows 10 users have actually reported that it shows up when attempting to install Windows 10 builds, including the latest 14393.
A lot of the Insider members reported that they had been scanning for brand-new Windows updates when error 0x80246007 occurred. Meanwhile, there is likewise a pretty good portion of users who mentioned that the very same problem occurred when they had been trying to install Windows 10.
How to Fix Windows Update Error 0x80246007?
Method 1: Check your Antivirus
Often your antivirus might be triggering this error to shield you from threats. Nonetheless, you can try to disable it for sometimes then attempt to run the system restore again. If the issue still remains, it’s suggested to entirely disable your antivirus and check if that resolves the issue. In worst case scenario, you may need to remove your antivirus completely and check if that fixes the issue.
Method 2: Run Windows Update Troubleshooter
Windows Update Troubleshooter is a function, which is used for detection and automatic fix of the operating system.
- Press Windows + X and select Control Panel.
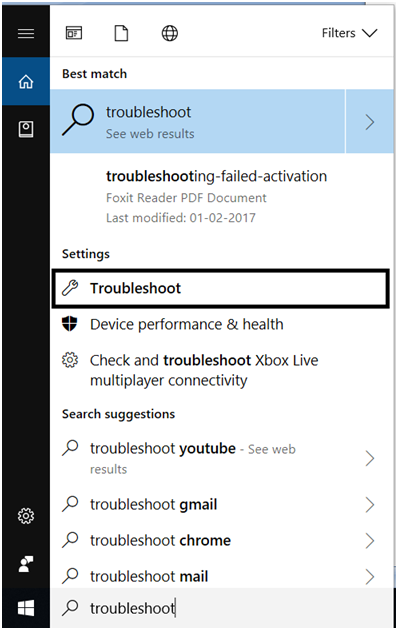
- In the search bar type “troubleshoot”. When Troubleshooting appears on the list, click it.
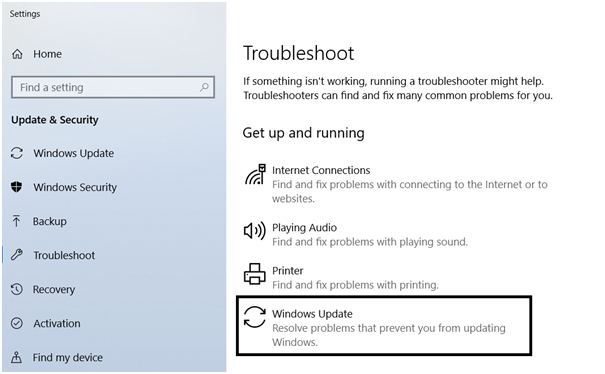
- Click Fix problems with Windows Updates which is under the System and Security.
Method 3: Set BITS Services to Run Automatically
Background Intelligent Transfer Service (BITS) is an important service for Updates. On some occasions, due to different factors it can crash and stop working and error code 0x80246007 appears. What you have to do is restart the service and see if there is an improvement in the Update procedure.
- Press Windows Key + R to launch Run. Type services.msc and press Enter.
- Look for Background Intelligent Transfer Service (BITS) and double-click it to open its properties.
- If the service isn’t running, click the Start.
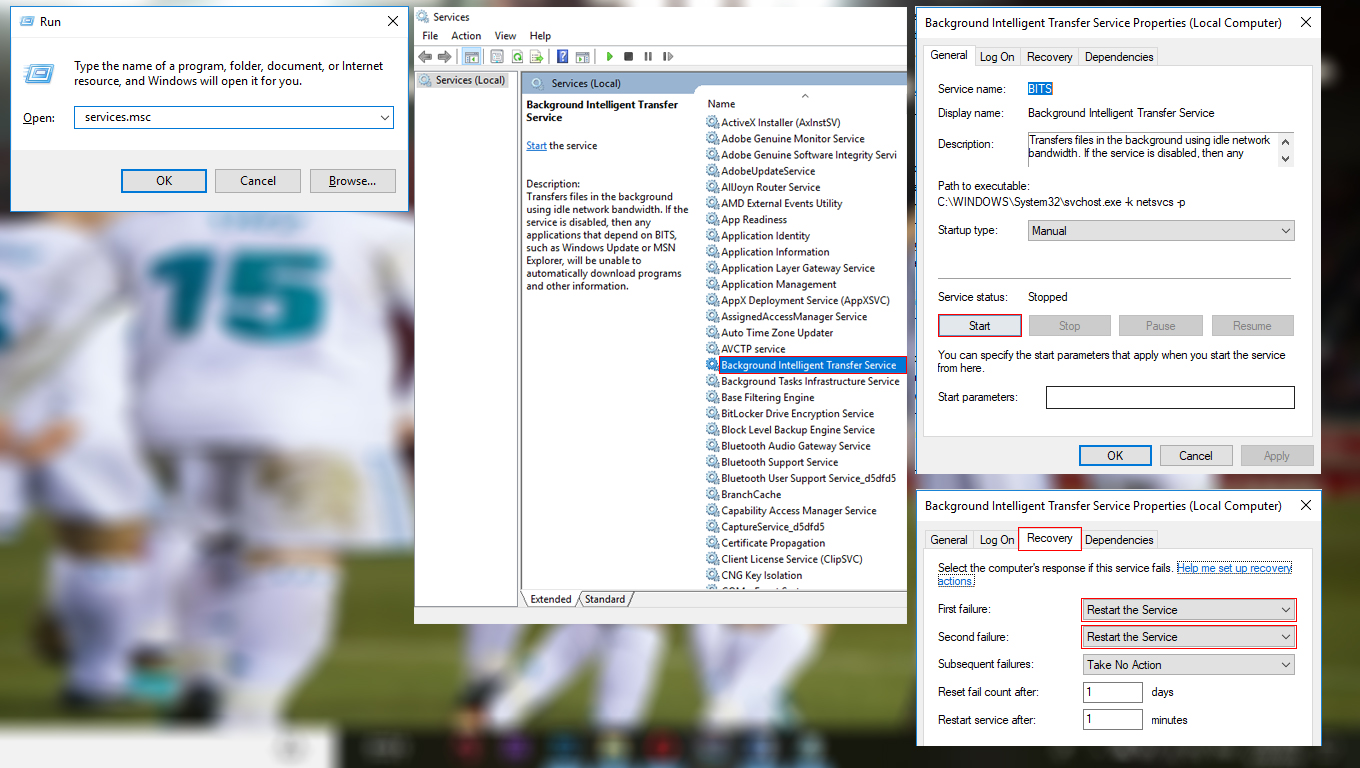
- Choose Recovery tab and make sure that First failure and Second failure are set to Restart service.
- Confirm selection and check for updates.
Method 4: Create your Own Repair.bat File
- Launch Notepad.
- Copy one of the following codes in the Notepad file:
net stop wuauserv
cd %systemroot%\SoftwareDistribution
ren Download Download.old
net start wuauserv
net stop bits
net start bits
- Go to File > Save As.
- Enter bat as the file name. In the Save as type box, click All Files (*.*) and save the file on your desktop.
- Right-click the Repair.bat file and select Run as administrator. Type the administrator password if required, or click Continue.
- Try to install the build again. When the build has been installed, delete the Repair.bat file.
Method 5: Empty Windows Update Folder
Whether error 0x80246007 occurs while trying to install Windows 10 or when attempting to update Windows, the general cause can be corruption within the update folder.
- Press Windows + R, type C:\Windows\SoftwareDistribution, and click on OK.
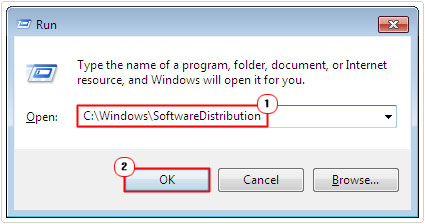
Where C:\ is the storage location of Windows.
- Once the SoftwareDistribution folder loads up, navigate to the Download folder and delete its contents.

Method 6: Checking Windows Defender Firewall Service
If you’re having trouble installing Windows 10 builds because of the error 0x80246007, you might want to check if your Windows Defender Firewall service is running.
- Click the Search icon on the taskbar.
- Type services, then hit Enter.
- You will be able to see the list of available services. Look for Windows Defender Firewall.
- Look at the status of the Windows Defender Firewall service. If you see that it is not running, right-click it, then select Start from the choices.
- Once you’ve started Windows Defender Firewall, check if you’ve gotten rid of the error 0x80246007.
Method 7: Perform a Clean Boot
- Press the Windows + R key on the keyboard.
- In the Run windows type msconfig and click Ok.
- On the General tab, click the Normal Startup option, and then click ok.
- When you are prompted to restart the computer, click Restart.
Method 8: Perform a System Restore
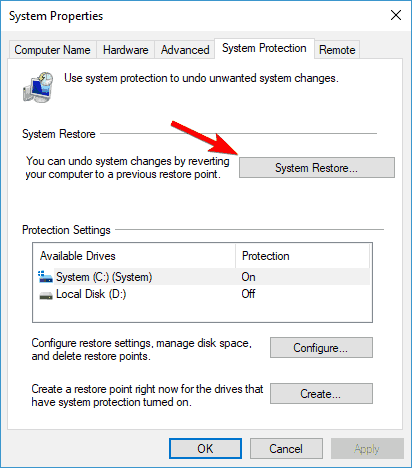
- Press Windows + S and enter system restore. Select Create a restore point from the list.
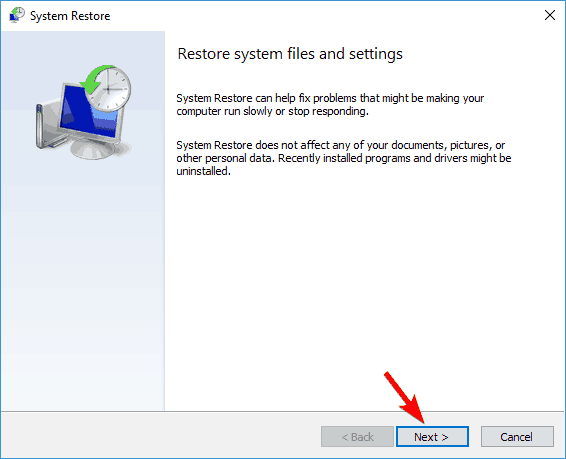
- Click the System Restore
- Now click Next.
- If available, check Show more restore points and pick the desired restore point. Now click the Next
- Follow the instructions on the screen to complete the restoration process.

 (46 votes, average: 4.64 out of 5)